A large portion of your team strength is determined by your weapon grid. Listed below are basic grids for each element, as well as a glimpse at the next step, so you have an idea of how a grid evolves as you progress. This is meant to be a starting point for your grids before you begin tackling harder raids, which will give you better weapons. Depending on your pace, it may not be necessary to fully farm each grid listed below.
Q: How do I tell weapon skills apart? Each weapon skill has a unique icon that shows what it boosts and what modifier it is:
- Omega skills have a Ω symbol
- EX skills have a EX symbol
- Normal skills will have no symbol or will have II or III depending on its strength
Some weapons come with unique skill icons like or where you will have to visit the individual weapon wiki page to learn about it, or read about them on this page.
As a beginner, you will want one or two EX and Normal attack skills in your grid with the rest of the weapon skills being Omega attack modifiers. For more information, see Weapon Skills or Damage Formula.
General Tips
Free Completion Rewards
Complete Main Quests to receive uncapped weapons and to unlock raids, free quests, and Side Stories (some of which will allow you to recruit free SSR characters). Clearing at least Chapter 62 Story: Stars Beyond the Sky is recommended to unlock most pre-rank 101 content.
Arcarum Passports are required to play Arcarum. One Passport is granted per day, but only after Arcarum is unlocked. Weekly missions require 7 Passports to be used per week, making unlocking Arcarum and using Passports a priority regardless of which stage of the game you're at. The mission arcapoint rewards can be left in the crate until they are needed, and can allow you to bypass the 50,000 holding cap for arcapoints.
Clear these Side Stories as soon as you can to jump-start your progression:
Other notable rewards include Nobiyo from Together in Song which is an easy access drop rate summon which also has a useful call effect and Bellringer Angel from Shadowverse: Duelist of Eternity which has a powerful defensive call. Both of these should not be reduced or reserved as there is no other way to obtain more copies.
How to get Grid Weapons
To farm a specific raid, use the in-game raid finder.
Renown Pendants can be used to buy 03 weapons from the Pendant Shop. Items in the Shop are restocked at the top of every month, with the exception of Luminiera Sword Omega, which has a lifetime limit of 10. The amount of pendants you can get per month is limited, so use them wisely.
Daily Points, earned from the Daily Bonus, can be traded for 03 weapons, including weapons otherwise exclusive to limited-time events like Xeno Clashes and Proving Grounds. Keep in mind these weapons cannot be fully uncapped without participating in the respective event while it is running.
Standard Omega Raids, also known as M1 raids.
How to get EXP / Skill Level Fodder
Simply participating in the monthly new story event, commonly referred to as "Boxing" events, is the easiest way to acquire 02 and 03 skill fodder. These usually occur at the end of every month.
The next best way is to do your daily Omega Raids for 02 and 03 fodder and 03 grid weapons.
Beginner Tip! A weapon's Skill Level is more important than its EXP Level. Be sure to skill up weapons that you know you will be using for a while!
Set up a basic grid of 0★ weapons before you uncap them with extra copies. In most cases, uncapping weapons will only give them extra raw ATK and HP, which is generally less valuable than having another of the weapon skill in your grid.
i.e. It is better to have four 0★ 03 weapons than a single 3★ 03 weapon.
Summons that are not your main summon do not have to match the element you are playing. As a beginner, it's better to equip summons that have the highest stats.
If you hit a wall in progression, leveling up weapon skills is the most effective way of gaining grid strength. However, skill fodder is hard to come by in the early game, so use them wisely.
Be sure to use Journey Drops for Upgrade EXP and Grand Success Rate whenever upgrading weapons to save on fodder!
Q: What is PWR? Does it matter? PWR, the indicator on the top left of your Home screen, is simply the sum of your weapons' ATK and HP. It doesn't take weapon skills into consideration. It is almost entirely useless as a metric for actual power.
Inventory Management
Reserving and Reducing
Reserving a weapon with a weapon skill will allow you to level weapon skills of other weapons.
respectively. These materials will be needed in the future for uncapping items.
In general, you should only reserve or reduce FARMABLE weapons or summons (i.e. weapons or summons that drop from raids or come from events. This does not generally include Side Story weapons, which are only purchasable a limited number of times from the Side Story's shop).
Keep*Keep three 3★ copies of each element, extras are safe to reduce
02 Premium Summons
Reduce
03 Premium Summons
Keep
Premium Draw Weapons
Beginner Tip! Keep your SSR Premium Draw weapons in your crate, or favorite and stash them so you don't accidentally fodder them.
It is recommended to keep all Premium Draw SSR weapons in your crate, because it acts as infinite storage. If you absolutely must claim your weapons from your crate, it's best to Favorite them and store them in a safe space, such as a stash.
Do not combine copies by uncapping them, as some grids require multiple copies of one weapon.
A majority of the SSR weapons received from pulling in Premium Draw will go unused, especially as a beginner, because their skills are primarily boosted by Optimus SummonsAlso called "Primal" Summons by the playerbase.. Often, both the weapons and the summon must be fully uncapped for best performance in a grid, which requires rare consumable materials like Sunlight Stones and Damascus Ingots.
In general, premium draw weapons are not useful in grids that are boosted by Omega Summons.
It is not recommended to invest into an Optimus grid until the player has a deep understanding of grid building, to ensure optimal usage of rare uncap materials.
The Power of Amplify
Seraphic Weapons provide "Amplify" skills. Because of how the Damage Formula works, these boost your final damage, which makes them very strong even at SR rarity.
Always equip a Seraphic Weapon and sub-aura summons (e.g. Arcarum series) when their in-battle conditions are met (usually, when your team is the advantaged element).
When using a character with an "Amplify All Element Allies' Damage" passive in your front row, keep in mind that this effect does not stack with the Seraphic Weapons' "Amplify" skill. Only the highest value takes effect.
Seraphic Weapons: Acquire these as soon as you're able to.
Upgrading the tetra elementFire, Water, Earth, and Wind weapons requires clearing stages of the Primarch Trials, which are limited to 2 attempts daily, with attempts shared across the four elements.
Arcarum Summons: Get the SR "Amplify" summon for every element first, upgrading as you go until they are SSR. Then start working on your desired Evoker.
It's recommended to work towards finishing The Hanged Man (SSR) first due to Caim's frequent use in Earth setups.
Dark Fencer is a Row III class that unlocks very useful skills that you will use throughout your entire gameplay. Because of this, it's recommended to focus on unlocking the Dark Fencer line first. Afterwards, feel free to unlock the rest of the Row I - III classes as you progress through the game.
Inflict 25% ATK DownATK is lowered Strength: 25%Base Accuracy: 80%Duration: 180 secondsStacking: Dual and 25% DEF DownDEF is lowered Strength: 25%Base Accuracy: 80%Duration: 180 secondsStacking: Dual on all foes.Inflict GravitySpecial attack max charge turn is extended Duration: 180 seconds on a foe.
Relic Buster is a Row IV class that can be unlocked by simply trading materials. It is a fantastic generalist that carries a lot of utility that will help carry you through the early game and well into mid- to endgame. Be sure to pick up Tactical ShieldAll allies gain ShieldNext ATK received will be ineffective for a fixed amount Duration: Indefinite, Veil (1 time)Debuffs will be nullified (1 time) Duration: Indefinite"Veil" is an unofficial name used by the wiki for this status effect. Its actual in-game name is "Immune.", and 100% / 20% ArmoredChance of lowering DMG taken Strength: 100% chance of taking 20% less damage.Duration: 3 turns. (Boost to ShieldNext ATK received will be ineffective for a fixed amount Duration: Indefinite's specs based on number of Machine CellConsumed upon normal attacks and using skills (Can't be removed / Max: 5) .) for defensive utility and Limit BurstAll allies gain Charge Bar +Instantly boosts Charge Bar by , C.A. DMG Up (1 time)Charge attack DMG is boosted (1 time) Duration: Indefinite, and C.A. DMG Cap Up (1 time)Charge attack DMG cap is boosted (1 time) Duration: Indefinite based on number of Machine CellConsumed upon normal attacks and using skills (Can't be removed / Max: 5) . (Consumes all Machine CellConsumed upon normal attacks and using skills (Can't be removed / Max: 5) .) for quick offensive bursting.
Replacements: Any 3★ EX modifier weaponPremium Options: Lord of Flames 0★
Core Grid Weapons
A free 3★ Colossus Blade Omega is given by clearing the story, however this weapon doesn't have a Might weapon skill and is less helpful to a beginner player.
Bahamut Weapons are very strong Normal modifiers and can be used in any element grid. Once forged further, they will boost two races depending on the weapon type.
Dagger of Bahamut Coda boosts Human and Erune characters which are the most common races in the game.
Sword of Bahamut Coda is the second common choice which boosts Humans and Draph characters.
More Bahamut Weapons can be forged later to support different team compositions.
Cosmos Weapons are best used when grids consist primarily of the same weapon type (e.g Staves, Swords, Axes, etc.).
These weapons are useful filler if you get one, however obtaining a Cosmic Weapon can be cumbersome and go largely unused in most endgame grids. It is not recommended to go out of your way to obtain one.
Only one copy of a Cosmos Weapon is needed, feel free to fodder extras.
More useful as a grid piece once uncapped to 4★, which is locked behind rank 151.
Once Impossible-tier raids are unlocked at Rank 101, players should start to build different grids depending on the type of content they want to tackle.
Basic Grid
Short Fight
Long Fight
Colossus Cane Grid
This grid can still serve as a solid baseline for any early content as you start to branch off into more specialized grids. Due to some Colossus Canes getting replaced in later grids, 4★ uncapping all of the copies below is not entirely necessary.
This grid setup utilizes the unique Stamina modifier from Nilakantha which boosts your party the higher their HP is which is ideal for any short content where you will not be taking many turns. This weapon can be equipped at 0★ due to it having all of its weapon skills unlocked already.
Al-Abad is introduced to add Supplemental Damage to allies' charge attacks for setups utilizing Relic Buster's Limit BurstAll allies gain Charge Bar +Instantly boosts Charge Bar by , C.A. DMG Up (1 time)Charge attack DMG is boosted (1 time) Duration: Indefinite, and C.A. DMG Cap Up (1 time)Charge attack DMG cap is boosted (1 time) Duration: Indefinite based on number of Machine CellConsumed upon normal attacks and using skills (Can't be removed / Max: 5) . (Consumes all Machine CellConsumed upon normal attacks and using skills (Can't be removed / Max: 5) .).
Replacements: Benbenet For teams not utilizing charge attacks.
Replacements: Benbenet For teams not utilizing charge attacks.
Basic Grid
Short Fight
Long Fight
Ancient Ecke Sachs Grid
This grid utilizes the Enmity weapon skill on Ancient Ecke Sachs which boosts your team when they take more damage. This is more suited for longer and harder content fights where enemy triggers will start doing more damage to the party. Multiple copies are also equipped to reach ~100% critical hit rate, though this cannot be fully achieved until Colossus Omega is uncapped to 5★ at rank 151. For further setups, see Advanced Grids.
Stacking four copies in your grid with 4★ Colossus Omega in Main/Support summons brings you to 88.4% critical hit chance. Later on, once you begin using 5★ Colossus, this will jump up to 98.8% crit chance.
This weapon should always be in a grid when fighting at an elemental advantage because of its 20% damage amplify.
See Damage Formula for a detailed explanation of how the game calculates damage.
Its 4★ upgrade into the Sword of Valorblaze, which increases its amplify from 20% to 23%, costs a sizeable amount of hard-to-get materials and should not be prioritized.
One of Fire's few charge attack related weapons, provides 400,000 Supplemental Damage to Fire allies' charge attacks as well as boosts Charge Attack Cap Up.
This weapon comes uncapped to 3★ when obtained. Only one copy of a Cosmos Weapon is needed, feel free to fodder extras.
Functions as filler until uncapped to 4★ which is locked behind materials accessed at rank 151 in Grand Order (Impossible).
At 4★, the boost to the ATK and HP of equipped swords increases to 50% and gains a 1% boost to Damage Cap based on how many swords are equipped.
Xeno Weapons
These EX weapons can be dropped from Xeno Clashes which are found in Special Quests. These fights can be difficult for brand new players, but picking some up will help boost your grid substantially compared to other Side Story EX weapons.
Not as useful in a grid until it is 4★ uncapped. Will provide more utility once awakened.
Attack awakening is suggested as first awakening.
A fully upgraded and awakened Proving Grounds weapon is stronger as a grid slot than a fully forged Xeno weapon in terms of EX modifiers.
Can be used as early Ancient Ecke Sachs crit filler once 4★ uncapped, but otherwise this weapon needs multiple fully awakened copies and a more advanced grid to fully utilize outside of a Melee mainhand.
Only one copy can be obtained and is 3★ when purchased
Can function as a Colossus Cane Omega replacement as it has the same Big ATK modifier.
Will become more useful in a more developed grid once it is 4★ uncapped and unlocks its ProgressionBoost to elemental ATK based on number of turns passed. See Damage Formula for more information. skill.
Has a 4★ uncap and can be upgraded to Ray of Zhuque Malus which can be further uncapped to 5★ after rank 120.
This weapon is used in endgame grids due to its damage cap up weapon skill. This weapon is less useful in beginner grids as they will not be able to reach the damage cap.
Special Premium Draw Weapons
Warning! Any weapons listed below can be used at 0★ and should not be uncapped with Damascus Ingots until the player reaches a point in their progression to understand their value and what benefits uncapping offers.
Provides very strong boosts to EX ATK40%, DEF25%, and Special DMG Cap7% (Max: 20%) when 4 or more weapons of the same weapon groupe.g., 4 Swords, 4 Spears, 4 Staves, etc. are equipped.
Does not require uncapping or skill leveling to slot in a grid.
Boost stacks with multiple copies.
EX ATK boost is stronger than an SL20 Unworldly EX modifier weapon.
Can be used with Colo Cane and AES stacking grids.
Provides 50,000 supplemental damageFlat damage that is added onto every damage instance. See Supplemental Damage for more information. for all Fire allies.
Provides 8% EX ATKUp to a total of 80% per Axe weapon in the grid.
Does not require uncapping or skill leveling to slot in a grid.
Boost stacks with multiple copiesUp to a combined total of 80%.
Functions less as an initial EX grid piece due to the lack of beginner Fire Axe weapons, but will become much stronger as your grid develops and you obtain weapons like Scythe of Renunciation, Garnet Broadaxe, and True Infernal Flamescythe to synergize with its Voltage skill.
Can be used as a main summon until a 3★ Colossus Omega summon is obtained.
Provides 50% boost to all Elemental ATK which means it can be used a a main summon in all elements.
Also provides an additional 10% boost to HP.
Premium Draw
Some summons obtained through Premium Draw can provide sizeable Elemental ATK boost and can serve as your main summon until higher uncaps of Colossus Omega are obtained.
Warning! It is not recommended to use Sunlight Stones to uncap any summons until the player reaches a point in their progression to understand their value and what benefits uncapping offers.
Also has a useful sub-auraHekate's EmbraceDeals fire DMG to all foes every 3 turns (Can't be removed) to Fire MC at battle start. (Deals 700% Fire damage to all foes every 3 turns [Damage cap: ~1,160,000].) at 4★.
A strong summon for advanced players with access to other strong summon calls. For a beginner, this summon is just used for its 100%+ Elemental ATK main aura.
A free 3★ Leviathan Bow Omega is given by clearing the story, however this weapon doesn't have a Might weapon skill and is less helpful to a beginner player.
Bahamut Weapons are very strong Normal modifiers and can be used in any element grid. Once forged further, they will boost two races depending on the weapon type.
Dagger of Bahamut Coda boosts Human and Erune characters which are the most common races in the game.
Sword of Bahamut Coda is the second common choice which boosts Humans and Draph characters.
More Bahamut Weapons can be forged later to support different team compositions.
Cosmos Weapons are best used when grids consist primarily of the same weapon type (e.g Staves, Swords, Axes, etc.).
These weapons are useful filler if you get one, however obtaining a Cosmic Weapon can be cumbersome and go largely unused in most endgame grids. It is not recommended to go out of your way to obtain one.
Only one copy of a Cosmos Weapon is needed, feel free to fodder extras.
More useful as a grid piece once uncapped to 4★, which is locked behind rank 151.
Once Impossible-tier raids are unlocked at Rank 101, players should start to build different grids depending on the type of content they want to tackle.
Basic Grid
Short Fight
Long Fight
Leviathan Dagger Grid
This grid can still serve as a solid baseline for any early content as you start to branch off into more specialized grids. Due to some Leviathan Daggers getting replaced in later grids, 4★ uncapping all of the copies below is not entirely necessary.
This grid utilizes the crit boost weapon skill on Ancient Auberon as well as the small HP boost for survivability. This is more suited for longer and harder content fights where players will want to sacrifice a bit of damage for more sustain. Ideally these weapons are equipped alongside Wamdus's Cnidocyte for more damage which are unlocked after rank 151. For further setups, see Advanced Grids.
This weapon provides a decent ATK boost alongside Charge Attack specs. Because of this, it outperforms Leviathan Gaze Omega as long as your team charge attacks.
A third harp can be used, but is not a priority for beginner grids yet.
This weapon should always be in a grid when fighting at an elemental advantage because of its 20% damage amplify.
See Damage Formula for a detailed explanation of how the game calculates damage.
Its 4★ upgrade into the Wand of Charmtide, which increases its amplify from 20% to 23%, costs a sizeable amount of hard-to-get materials and should not be prioritized.
Relatively weak when only equipping a few by themselves, this weapon will be the core grid piece for critical hit rate focused endgame grids that include Wamdus's Cnidocyte.
2-3 are generally used, up to 4 when survival is prioritized over damage.
Also comes with a small amount of HP, which adds up to a decent boost when stacking multiple.
Xeno Weapons
These EX weapons can be dropped from Xeno Clashes which are found in Special Quests. These fights can be difficult for brand new players, but picking some up will help boost your grid substantially compared to other Side Story EX weapons.
Only one copy can be obtained and is 3★ when purchased
Can function as a Leviathan Gaze Omega replacement as it has the same Big ATK modifier.
Will become more useful in a more developed grid once it is 4★ uncapped and unlocks its ProgressionBoost to elemental ATK based on number of turns passed. See Damage Formula for more information. skill.
Has a 4★ uncap and can be upgraded to Xuanwu Mace Malus which can be further uncapped to 5★ after rank 120.
This weapon is used in endgame grids due to its damage cap up weapon skill. This weapon is less useful in beginner grids as they will not be able to reach the damage cap.
Special Premium Draw Weapons
Warning! Any weapons listed below can be used at 0★ and should not be uncapped with Damascus Ingots until the player reaches a point in their progression to understand their value and what benefits uncapping offers.
Provides 50,000 supplemental damageFlat damage that is added onto every damage instance. See Supplemental Damage for more information. for all Water allies.
Provides 8% EX ATKUp to a total of 80% per Dagger weapon in the grid.
Does not require uncapping or skill leveling to slot in a grid.
Boost stacks with multiple copiesUp to a combined total of 80%.
Can be used as a main summon until a 3★ Leviathan Omega summon is obtained.
Provides 50% boost to all Elemental ATK which means it can be used a a main summon in all elements.
Also provides an additional 10% boost to HP.
Premium Draw
Some summons obtained through Premium Draw can provide sizeable Elemental ATK boost and can serve as your main summon until higher uncaps of Leviathan Omega are obtained.
Warning! It is not recommended to use Sunlight Stones to uncap any summons until the player reaches a point in their progression to understand their value and what benefits uncapping offers.
A strong summon for advanced players with access to other strong summon calls. For a beginner, this summon is just used for its 100%+ Elemental ATK main aura.
Bahamut Weapons are very strong Normal modifiers and can be used in any element grid. Once forged further, they will boost two races depending on the weapon type.
Dagger of Bahamut Coda boosts Human and Erune characters which are the most common races in the game.
Sword of Bahamut Coda is the second common choice which boosts Humans and Draph characters.
More Bahamut Weapons can be forged later to support different team compositions.
This grid can still serve as a solid baseline for any early content as you start to branch off into more specialized grids. Due to some Yggdrasil Crystal Blade Omega getting replaced in later grids, 4★ uncapping all of the copies below is not entirely necessary.
This grid is the next step after reaching rank 120 before fully dropping duplicate weapons for a Caim-focused "highlanderWhen all equipped weapons are different." grid. For further setups, see Advanced Grids.
Main Summon
Support Summon
Omega Weapon Skill Boost 4★
Omega Weapon Skill Boost 5★
Basic Grid
100% Crit
Caim Highlander
Caim Highlander Grid
This grid has dropped all duplicate weapons to activate Caim'sThe Hanged Man ReversedWhen Sub Ally: When all equipped weapons are different, 20% boost to Earth allies' ATKMultiplier:Perpetuity, 50% boost to DEF, and 10% boost to damage cap. At level 95: Also supplement Earth allies' damage (Damage cap: 20,000).. For further setups, see Advanced Grids.
This weapon should always be in a grid when fighting at an elemental advantage because of its 20% damage amplify.
See Damage Formula for a detailed explanation of how the game calculates damage.
Its 4★ upgrade into the Gauntlet of Proudearth, which increases its amplify from 20% to 23%, costs a sizeable amount of hard-to-get materials and should not be prioritized.
Ideally used in bonus damage normal attack focused team compositions.
Attack awakening is suggested.
Xeno Weapons
These EX weapons can be dropped from Xeno Clashes which are found in Special Quests. These fights can be difficult for brand new players, but picking some up will help boost your grid substantially compared to other Side Story EX weapons.
Base form of Last Sahrivar which can be upgraded to 5★.
Its "Massive" EX modifier puts it above most EX weapon in terms of grid strength.
Useful Sword mainhand once fully forged. Also brings Water SwitchElemental DMG from foes turns into water DMG on its charge attack which can be useful against any foes that deal non-water damage.
Will become more useful in a more developed grid once it is 4★ uncapped and unlocks its ProgressionBoost to elemental ATK based on number of turns passed. See Damage Formula for more information. skill.
Has a 4★ uncap and can be upgraded to Baihu Claw Malus which can be further uncapped to 5★ after rank 120.
This weapon is used in endgame grids due to its damage cap up weapon skill. This weapon is less useful in beginner grids as they will not be able to reach the damage cap.
Special Premium Draw Weapons
Warning! Any weapons listed below can be used at 0★ and should not be uncapped with Damascus Ingots until the player reaches a point in their progression to understand their value and what benefits uncapping offers.
Can be used as a main summon until a 3★ Yggdrasil Omega summon is obtained.
Provides 50% boost to all Elemental ATK which means it can be used a a main summon in all elements.
Also provides an additional 10% boost to HP.
Premium Draw
Some summons obtained through Premium Draw can provide sizeable Elemental ATK boost and can serve as your main summon until higher uncaps of Yggdrasil Omega are obtained.
Warning! It is not recommended to use Sunlight Stones to uncap any summons until the player reaches a point in their progression to understand their value and what benefits uncapping offers.
A strong summon for advanced players with access to other strong summon calls. For a beginner, this summon is just used for its 100%+ Elemental ATK main aura.
Bahamut Weapons are very strong Normal modifiers and can be used in any element grid. Once forged further, they will boost two races depending on the weapon type.
Dagger of Bahamut Coda boosts Human and Erune characters which are the most common races in the game.
Sword of Bahamut Coda is the second common choice which boosts Humans and Draph characters.
More Bahamut Weapons can be forged later to support different team compositions.
Functional Sword mainhand until something better is acquired.
Rank 1-100
Rank 101+
Once Impossible-tier raids are unlocked at Rank 101, players should start to build different grids depending on the type of content they want to tackle.
Basic Grid
Short Fight
Long Fight
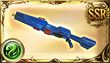
Tiamat Bolt Grid
This grid can still serve as a solid baseline for any early content as you start to branch off into more specialized grids. Due to some Tiamat Guns and Tiamat Fists getting replaced in later grids, 4★ uncapping all of the copies below is not entirely necessary.
This grid setup utilizes the unique Stamina modifier from Last Storm Harp which boosts your party the higher their HP is which is ideal for any short content where you will not be taking many turns. It also uses the Tyranny and Betrayal from Ancient Nalakuvara which is ideal for shorter content. The first Harp can be equipped in the grid at 0★ but it is recommended to equip subsequent copies once you have uncapped them fully.
This grid utilizes more weapons that provide HP are used to boost survivability. This is more suited for longer and harder content fights where players will want to sacrifice a bit of damage for more sustain. For further setups, see Advanced Grids.
This weapon should always be in a grid when fighting at an elemental advantage because of its 20% damage amplify.
See Damage Formula for a detailed explanation of how the game calculates damage.
Its 4★ upgrade into the Ring of Wandergale, which increases its amplify from 20% to 23%, costs a sizeable amount of hard-to-get materials and should not be prioritized.
Very strong Omega ATK modifier for fights that last less than 8 turns.
Xeno Weapons
These EX weapons can be dropped from Xeno Clashes which are found in Special Quests. These fights can be difficult for brand new players, but picking some up will help boost your grid substantially compared to other Side Story EX weapons.
Only one copy can be obtained and is 3★ when purchased
Can function as a Tiamat Gauntlet Omega replacement as it has the same Big ATK modifier.
Will become more useful in a more developed grid once it is 4★ uncapped and unlocks its ProgressionBoost to elemental ATK based on number of turns passed. See Damage Formula for more information. skill.
Has a 4★ uncap and can be upgraded to Qinglong Spear Malus which can be further uncapped to 5★ after rank 120.
This weapon is used in endgame grids due to its damage cap up weapon skill. This weapon is less useful in beginner grids as they will not be able to reach the damage cap.
Special Premium Draw Weapons
Warning! Any weapons listed below can be used at 0★ and should not be uncapped with Damascus Ingots until the player reaches a point in their progression to understand their value and what benefits uncapping offers.
Provides 50,000 supplemental damageFlat damage that is added onto every damage instance. See Supplemental Damage for more information. for all Wind allies.
Provides 8% EX ATKUp to a total of 80% per Dagger weapon in the grid.
Does not require uncapping or skill leveling to slot in a grid.
Boost stacks with multiple copiesUp to a combined total of 80%.
Dagger grid weapons are fairly uncommon in Wind, so players should not force Dagger Voltage II synergy.
Can be used as a main summon until a 3★ Tiamat Omega summon is obtained.
Provides 50% boost to all Elemental ATK which means it can be used a a main summon in all elements.
Also provides an additional 10% boost to HP.
Premium Draw
Some summons obtained through Premium Draw can provide sizeable Elemental ATK boost and can serve as your main summon until higher uncaps of Tiamat Omega are obtained.
Warning! It is not recommended to use Sunlight Stones to uncap any summons until the player reaches a point in their progression to understand their value and what benefits uncapping offers.
A strong summon for advanced players with access to other strong summon calls. For a beginner, this summon is just used for its 100%+ Elemental ATK main aura.
This is a beginner grid used before reaching rank 101. Afterwards, you will transition to a Lumi Sword grid. Luminiera Bolt Omega is preferred over Luminiera Harp Omega due to its higher raw stats, but Harps can be used while transitioning to stronger grids.
Light's second best ATK modifier in the early game. It has slightly lower base stats compared to Luminiera Bolt Omega. Stacking multiple is recommended before uncapping with copies.
Do not fodder in case you pull Harmonia later on. Up to 3 are still used even in endgame grids.
Bahamut Weapons are very strong Normal modifiers and can be used in any element grid. Once forged further, they will boost two races depending on the weapon type.
Dagger of Bahamut Coda boosts Human and Erune characters which are the most common races in the game.
Sword of Bahamut Coda is the second common choice which boosts Humans and Draph characters.
More Bahamut Weapons can be forged later to support different team compositions.
This is a beginner grid using Harmonia before reaching rank 101. Afterwards, you will transition to a Lumi Sword grid.
Harmonia can be used at 0★ and should not be uncapped with Damascus Ingots until the player reaches a point in their progression to understand their value and what benefits uncapping offers.
Main Summon
Support Summon
Omega Weapon Skill Boost 3★
Elemental ATK Boost
Replacements: A 2nd Harmonia copy can be used here
With Harmonia's Harp Voltage8% boost to ATK (Max: 80%) to all allies per Harp weapon in the grid. weapon skill, Light's best ATK modifier in the early game. Stacking multiple is recommended before uncapping with copies.
Up to 3 are still used even in endgame grids with Harmonia.
Bahamut Weapons are very strong Normal modifiers and can be used in any element grid. Once forged further, they will boost two races depending on the weapon type.
Dagger of Bahamut Coda boosts Human and Erune characters which are the most common races in the game.
Sword of Bahamut Coda is the second common choice which boosts Humans and Draph characters.
More Bahamut Weapons can be forged later to support different team compositions.
Cosmos Weapons are best used when grids consist primarily of the same weapon type (e.g Staves, Swords, Axes, etc.).
These weapons are useful filler if you get one. The Cosmic Harp can eventually be used in some endgame Harmonia grids to provide extra damage cap up when needed after it's uncapped to 4★.
4★ uncap is locked behind rank 151.
Only one copy of a Cosmos Weapon is needed, feel free to fodder extras.
Filler Normal ATK modifier that is also a synergizes with Harmonia's Harp Voltage8% boost to ATK (Max: 80%) to all allies per Harp weapon in the grid. weapon skill.
Once Impossible-tier raids are unlocked at Rank 101, players should start to build different grids depending on the type of content they want to tackle.
Basic Grid
Short Fight
Long Fight
Beginner Sword Grid
This grid requires reaching rank 101 so Luminiera Sword Omega can be 4★ uncapped. Luminiera Swords should not be used in the grid unless they are 4★ uncapped. Luminiera Harps and Guns should be used instead while transitioning to a full sword grid.
Main Summon
Support Summon
Omega Weapon Skill Boost 4★
Elemental ATK Boost
Replacements: Any strong EX modifier
Basic Grid
Short Fight
Long Fight
Harakhte Charge Attack Grid
Once reaching rank 120, players can start farming Ennead Weapons which also have the ability to add bonus stats with Weapon Awakening. This setup focuses on Harakhte and its charge attack boosting skills which are ideal for short burst fights with Relic Buster or other quick charge attack setups.
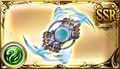
Luminiera Sword Omega is a unique weapon that provides both Omega ATK and Normal ATK as well as a little HP which is boostable by Luminiera Omega. This makes is a great weapon for short and long content grids and is used well into endgame Light Omega grids.
This weapon introduces a boostable StaminaMore ATK based on how high HP is modifier to your grid before you can uncap your Sword of Renunciation to 5★ at rank 170.
The critical hit rate boost is largely wasted as the chance will be too low for it to be meaningful.
This weapon should always be in a grid when fighting at an elemental advantage because of its 20% damage amplify.
See Damage Formula for a detailed explanation of how the game calculates damage.
It's 4★ upgrade into the Harp of Everlore which increases its amplify from 20% to 23% costs a sizeable amount of hard-to-get materials and should not be prioritized.
One of Light's only charge attack related weapons, provides 400,000 Supplemental Damage to Light allies' charge attacks as well as boosts Charge Attack Cap Up.
This weapon functions similarly to Mittron's Bow but with a slightly lower base ATK stat.
Its Big critical hit rate boost goes largely unused without stacking multiple, which isn't entirely recommended due to how strong Lumi Swords are.
This weapon is very expensive to purchase in the shop and should not be purchased.
Xeno Weapons
These EX weapons can be dropped from Xeno Clashes which are found in Special Quests. These fights can be difficult for brand new players, but picking some up will help boost your grid substantially compared to other Side Story EX weapons.
Only one copy can be obtained and is 3★ when purchased
Not as useful as a grid piece due to the abundance of Normal ATK modifiers in a standard Lumi Sword grid.
Situational mainhand option for charge attack focused teams.
Special Premium Draw Weapons
Warning! Any weapons listed below can be used at 0★ and should not be uncapped with Damascus Ingots until the player reaches a point in their progression to understand their value and what benefits uncapping offers.
Provides 50,000 supplemental damageFlat damage that is added onto every damage instance. See Supplemental Damage for more information. for all Light allies.
Provides 8% EX ATKUp to a total of 80% per Harp weapon in the grid.
Can be used as a main summon until a 3★ Luminiera Omega summon is obtained.
Ideally used as a sub-summon as it provides an additional 10% boost to HP when equipped as a sub-aura.
Does not stack with other HP boosting sub auras such as Artemis. Only the highest boost takes effect.
Premium Draw
Some summons obtained through Premium Draw can provide sizeable Elemental ATK boost and can serve as your main summon until higher uncaps of Luminiera Omega are obtained.
Warning! It is not recommended to use Sunlight Stones to uncap any summons until the player reaches a point in their progression to understand their value and what benefits uncapping offers.
Cannot be uncapped to 5★ until rank 120.A Providence Globe can be used to uncap this summon to 4★ and 5★, but it not recommended to purchase this item.
A strong summon for advanced players with access to other strong summon calls. For a beginner, this summon is just used for its 100%+ Elemental ATK main aura.
This weapon has two ATK skills (Medium ATK + Small Enmity), making it stronger than the single Big ATK skills on Celeste Horn Omega and Celeste Zaghnal Omega in any situation where the party loses HP. In later grids, a few are typically replaced by Abyss Spine.
Bahamut Weapons are very strong Normal modifiers and can be used in any element grid. Once forged further, they will boost two races depending on the weapon type.
Dagger of Bahamut Coda boosts Human and Erune characters which are the most common races in the game.
Sword of Bahamut Coda is the second common choice which boosts Humans and Draph characters.
More Bahamut Weapons can be forged later to support different team compositions.
Pain and Suffering can be used at 0★ and should not be uncapped with Damascus Ingots until the player reaches a point in their progression to understand their value and what benefits uncapping offers.
Bahamut Weapons are very strong Normal modifiers and can be used in any element grid. Once forged further, they will boost two races depending on the weapon type.
Dagger of Bahamut Coda boosts Human and Erune characters which are the most common races in the game.
Sword of Bahamut Coda is the second common choice which boosts Humans and Draph characters.
More Bahamut Weapons can be forged later to support different team compositions.
This weapon has two ATK skills (Medium ATK + Small Enmity), making it stronger than the single Big ATK skills on Celeste Horn Omega and Celeste Zaghnal Omega in any situation where the party loses HP.
Cosmos Weapons are best used when grids consist primarily of the same weapon type (e.g Staves, Swords, Axes, etc.).
These weapons are useful filler if you get one, however obtaining a Cosmic Weapon can be cumbersome and go largely unused in most endgame grids. It is not recommended to go out of your way to obtain one.
Only one copy of a Cosmos Weapon is needed, feel free to fodder extras.
More useful as a grid piece once uncapped to 4★, which is locked behind rank 151.
Once Impossible-tier raids are unlocked at Rank 101, players should start to build different grids depending on the type of content they want to tackle.
Basic Grid
Short Fight
Long Fight
Beginner Claw Grid
This grid can still serve as a solid baseline for any early content as you start to branch off into more specialized grids. Due to some Celste Claws getting replaced in later grids, 4★ uncapping all of the copies below is not entirely necessary.
Main Summon
Support Summon
Omega Weapon Skill Boost 4★
Elemental ATK Boost
Replacements: Any strong EX modifier
Basic Grid
Short Fight
Long Fight
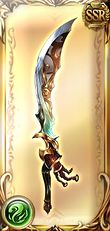
Abyss Spine Grid
Once reaching rank 120, players can start dropping their beginner Celeste Claws for charge attack-focused Abyss Spines. For further setups, see Advanced Grids.
Main Summon
Support Summon
Omega Weapon Skill Boost 4★
Elemental ATK Boost
Replacements: Any strong EX modifier
Basic Grid
Short Fight
Long Fight
Zechariah HP Grid
This grid focuses on more survivability through switching support summons and including weapons such as Zechariah and Qilin Sword. This is more suited for longer and harder content fights where players will want to sacrifice a bit of damage for more sustain. For further setups, see Advanced Grids.
This weapon should always be in a grid when fighting at an elemental advantage because of its 20% damage amplify.
See Damage Formula for a detailed explanation of how the game calculates damage.
Its 4★ upgrade into the Scythe of Darkherald, which increases its amplify from 20% to 23%, costs a sizeable amount of hard-to-get materials and should not be prioritized.
This weapon can introduce a boostable StaminaMore ATK based on how high HP is modifier to your grid before you can uncap your Katana of Renunciation to 5★ at rank 170.
This weapon is very expensive to purchase in the shop and should not be purchased until the rest of your grid is completed.
This is a strictly worse Fediel's Spine for Omega Dark unless you will be playing at low HP for most of the fight.
Attack or Defense awakening is suggested, depending on how you decide to use this weapon.
Useful Staff mainhand.
Xeno Weapons
These EX weapons can be dropped from Xeno Clashes which are found in Special Quests. These fights can be difficult for brand new players, but picking some up will help boost your grid substantially compared to other Side Story EX weapons.
Only one copy can be obtained and is 3★ when purchased
Strong Normal ATK modifier that comes with a flat 10% damage cap up.
This weapon is used in endgame grids due to its damage cap up weapon skill. This weapon is less useful in beginner grids as they will not be able to reach the damage cap.
Only one copy can be obtained and is 3★ when purchased
Useful early Sword mainhand.
Situational EX ATK modifier when defense against incoming Light damage is also needed.
Special Premium Draw Weapons
Warning! Any weapons listed below can be used at 0★ and should not be uncapped with Damascus Ingots until the player reaches a point in their progression to understand their value and what benefits uncapping offers.
Provides very strong boosts to EX ATK40%, DEF25%, and Special DMG Cap7% (Max: 20%) when 4 or more weapons of the same weapon groupe.g., 4 Swords, 4 Spears, 4 Staves, etc. are equipped.
Does not require uncapping or skill leveling to slot in a grid.
Boost stacks with multiple copies.
EX ATK boost is stronger than an SL20 Unworldly EX modifier weapon.
Provides 50,000 supplemental damageFlat damage that is added onto every damage instance. See Supplemental Damage for more information. for all Dark allies.
Provides 8% EX ATKUp to a total of 80% per Axe weapon in the grid.
Can be used as a main summon until a 3★ Celeste Omega summon is obtained.
Provides 50% boost to all Elemental ATK which means it can be used a a main summon in all elements.
Also provides an additional 10% boost to HP.
Premium Draw
Some summons obtained through Premium Draw can provide sizeable Elemental ATK boost and can serve as your main summon until higher uncaps of Celeste Omega are obtained.
Warning! It is not recommended to use Sunlight Stones to uncap any summons until the player reaches a point in their progression to understand their value and what benefits uncapping offers.
Ideally used as a sub-summon due to its sub-aura providing supplemental damageFlat damage that is added onto every damage instance. See Supplemental Damage for more information..
Cannot be uncapped to 5★ until rank 120.A Providence Globe can be used to uncap this summon to 4★ and 5★, but it not recommended to purchase this item.
A strong summon for advanced players with access to other strong summon calls. For a beginner, this summon is just used for its 100%+ Elemental ATK main aura.
Additional Resources
The links below are other resources commonly used by the Granblue community.