Basic Grids/WaterHL

From Granblue Fantasy Wiki
Jump to navigation Jump to search

Once Impossible-tier raids are unlocked at Rank 101, players should start to build different grids depending on the type of content they want to tackle.


Basic Grid

Short Fight

Long Fight

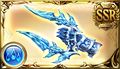
Leviathan Dagger Grid

This grid can still serve as a solid baseline for any early content as you start to branch off into more specialized grids. Due to some Leviathan Daggers getting replaced in later grids, 4★ uncapping all of the copies below is not entirely necessary.

Main Summon Support Summon

Omega Weapon Skill Boost 4★
Replacements:
Lucifer Lvl 250
Bahamut Lvl 250

Elemental ATK Boost


Replacements:
Any strong EX modifier

Replacements:
Any strong EX modifier


Basic Grid

Short Fight

Long Fight

Tyros Zither Charge Attack Grid

Once reaching rank 120, players can start dropping their beginner Leviathan Daggers for charge attack-focused Tyros Zithers. For further setups, see Advanced Grids.

Main Summon Support Summon

Omega Weapon Skill Boost 4★
Replacements:
Lucifer Lvl 250
Bahamut Lvl 250

Elemental ATK Boost


Replacements:
Any strong EX modifier


Replacements:
Any strong EX modifier


Basic Grid

Short Fight

Long Fight

Ancient Auberon HP Grid

This grid utilizes the crit boost weapon skill on Ancient Auberon as well as the small HP boost for survivability. This is more suited for longer and harder content fights where players will want to sacrifice a bit of damage for more sustain. Ideally these weapons are equipped alongside Wamdus's Cnidocyte for more damage which are unlocked after rank 151. For further setups, see Advanced Grids.

Main Summon Support Summon

Omega Weapon Skill Boost 4★

Omega Weapon Skill Boost 5★


Replacements:
Any strong EX modifier


Replacements:
Any strong EX modifier


Core Grid Weapons

Weapon Obtain Notes

Tyros Zither
Raid: Europa (Raid)
Shop:Prestige Pendant ×4,000
Daily Point Shop (150 Points)
  • This weapon provides a decent ATK boost alongside Charge Attack specs. Because of this, it outperforms Leviathan Gaze Omega as long as your team charge attacks.
  • A third harp can be used, but is not a priority for beginner grids yet.

Dagger of Bahamut Coda
Side Story: What Makes the Sky BlueTrade Bahamut Claw in the Shop
Shop: Bahamut Weapons

Wand of Gabriel (SSR)
Shop: Seraphic Weapons
  • This weapon should always be in a grid when fighting at an elemental advantage because of its 20% damage amplify.
    • See Damage Formula for a detailed explanation of how the game calculates damage.
    • Its 4★ upgrade into the Wand of Charmtide, which increases its amplify from 20% to 23%, costs a sizeable amount of hard-to-get materials and should not be prioritized.

Staff of Renunciation
Treasure Trade: Dark Opus Weapons
  • This will be an anchor piece for all Omega Water grids onwards into endgame content.
  • This weapon should not be used until it is uncapped to 4★ and upgraded to lvl 120 as that is when you unlock its second weapon skill.
  • 4★ Uncap Cost:
Shadow Substance ×5
Silver Centrum ×5
Legendary Merit ×10
Supreme Merit ×100
Water Urn ×30
Europa Omega Anima ×10

Supplementary Weapons

Weapon Obtain Notes

Ancient Auberon
Quest: Macula Marius Showdown
Sandbox: Zone Joculator
Shop: Prestige Pendant ×1,000
  • Relatively weak when only equipping a few by themselves, this weapon will be the core grid piece for critical hit rate focused endgame grids that include Wamdus's Cnidocyte.
    • 2-3 are generally used, up to 4 when survival is prioritized over damage.
  • Also comes with a small amount of HP, which adds up to a decent boost when stacking multiple.