Rose Queen (Raid)
This article is about the raid. For the regular summon stone, see Rose Queen. For the summer summon stone, see Rose Queen (Summer).
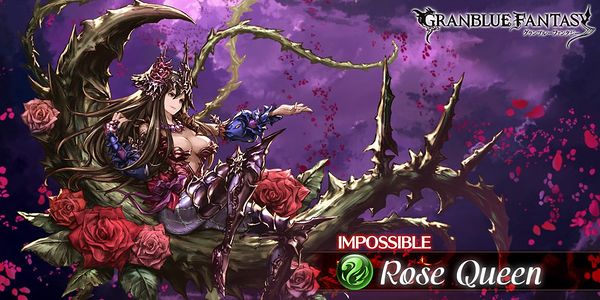
Rose Queen is one of the bosses of the main islands. She's first encountered in Lumacie Archipelago. Outside of the Main Quests, she is a Raid boss. This is an 18-man raid.
Contents
Raid Battles
![]() |
Disclaimer: Leeching this raid is frowned upon. If you have access to this raid you can and should contribute. |
---|
Rose Queen Showdown Impossible |
||
---|---|---|
Cost to Host: 50 AP![]() |
Cost to Join: Rank 101+; 3 EP | Unlock: Rank 101+; Chapter 50 Story: We Meet Again |
Participants: 18 Vice: 2nd-3rd | Elixirs: Unlimited | Strike Time: YesStrike Time bonus applies for this raid. |
Location: Chapter 15 (37/50/53): Lumacie Archipelago - Violet Lake Shore, Blackmoon Forest | Start QuestNetwork Errors will appear if the hosting conditions are not met. (AP, Host Materials, Daily Limit) |
|
TweetDeck: Lvl 110 Rose Queen Lv110 ローズクイーン |
Phase | Name | Lvl | HP | Charge | Mode |
---|---|---|---|---|---|
Boss | Rose Queen | ![]() |
220,000,000 | ◇◇◇ | Yes |
Special Attacks | Triggers and Notes | ||||
|
| ||||
Rose | Rose Queen | ![]() |
132,000,000 | ◇◇ | Yes |
Special Attacks | Triggers and Notes | ||||
|
| ||||
Bloom | Rose Queen | ![]() |
88,000,000 | ◇◇ | Yes |
Special Attacks | Triggers and Notes | ||||
|
| ||||
N - Normal, OD - Overdrive, TR - Trigger |
Rewards | |||
---|---|---|---|
First clear: ![]() |
|||
Host: ![]() |
Join: ![]() |
Crew: ![]() |
Chest 1 | Chest 2 | Chest 3 |
---|---|---|
Uncommon (~20%)With ![]() 1 |
Uncommon (~33%)With ![]() 1 |
Likely (~100%)With ![]() 1 |
|
||
Chest 4 | Chest 5 | Chest 6 |
100% | 100% | 100% |
|
||
![]() |
![]() |
![]() |
1 Drop percentages are with ![]() and are based on 200 Rose Queen runs. Drop table last updated: 2017-05-03, all stated drop rates are estimates. The game changes over time. If the drop tables become incorrect please notify the wiki staff. |
Voice Lines
- Voice Actor: Rie Tanaka
Solo Strategy

Rewards

If you want this trophy, you may not do the following:
- Have other players join through backup requests or raid codes.
- Use backup requests to get a blue potion, even if no other players join.
- Use a full elixir.
This trophy is aimed at late game players with finished grids. While, technically, there is nothing to lose by attempting the fight, please do not feel discouraged it you aren't able to clear it.
Main Character
Recommended classes for the main character include classes that can provide party sustain while still dealing damage. Since a portion of the fight will be weak element (if you bring Fire, the second phase is Dark, or if you bring Light to combat the Dark phase, you have to have enough damage against the Wind phases).
- Doctor is a strong pick due to its ability to generate Green Potions, and
Just the CureRestore 25% of all allies' HP (Healing cap: 1500). can be used for additional party healing, which is potentially made stronger by the class's Class Champion Weapon.
- Nekomancer brings strong offensive and defensive party buffs.
- Sage has strong sustain and Clear options.
- Chaos Ruler has strong debuffs.
Recommend subskills for the main character should aim to shore up whatever your team is lacking, but tend to focus on mitigating damage or preventing effects before buffing your own damage, as surviving is the most important part of the fight. Attack and defense debuffs like Miserable MistInflict
25% ATK DownATK is lowered
Strength: 25%Base Accuracy: 80%Duration: 180 secondsStacking: Dual and 25% DEF DownDEF is lowered
Strength: 25%Base Accuracy: 80%Duration: 180 secondsStacking: Dual on all foes., Rain of Arrows III300% elemental damage to all foes.
Inflict 25% ATK DownATK is lowered
Strength: 25%Duration: 180 seconds., and Armor Break100% elemental damage to a foe.
Inflict 20% DEF DownDEF is lowered
Strength: 20%Base Accuracy: 80%Duration: 180 secondsStacking: Single.[1] are always useful, with Mist being the reigning king of debuffs. ClarityRemove 1 debuff from all parties. is also a strong option to deal with the possible debuffs she can inflict.
Just the CureRestore 25% of all allies' HP (Healing cap: 1500). is a small heal, but is useful if you find it difficult to sustain as the fight draws on.
DispelRemoves 1 buff from a foe. is not recommended, as the repel damage during the Dark phase is negligible, and the slot could better be used elsewhere. However, if your party covers the roles of all of the above skills, it is an option.
Summons
Recommended summons include a bare minimum of two wind Carbuncles ( Peridot Carbuncle or
Prometheus). Given the long cooldown of Prometheus and its smaller cut at 0★, it is recommended to prioritize the Peridot Carbuncle despite its lower stats unless you have several Prometheus at 3★ or 4★. Since the fight is a marathon, two to three Carbuncles are recommended to maximize uptime on the damage cut to reduce the amount of incoming damage.
Other summons that have value in the fight include:
Bellringer Angel provides a 1200 damage
ShieldNext ATK received will be ineffective for a fixed amount
and the ability to reset one of your other summon cooldowns if that shield is broken (excluding summons that cannot be recast likeShiva (Summon)) means that you can attempt to circumvent a third Carbuncle by using this summon's effect to reset the cooldown of one of them. It is also readily available in a Side Story, making it accessible to even with terrible Gacha luck.
Athena (Summon) is another option if you lack a third Carbuncle, providing a 30% damage cut at 0-3★, and a 30% Damage Cut and
RefreshHP is restored on every turn
at 4★.The Devil (SR) and
The Devil (SSR) in a fire party will increase your maximum HP, and the call includes an attack and Defense down effect that can improve both your survivability and damage. It is also a non-Gacha option, being obtained through Arcarum.
The Sun (SSR) is another Arcarum summon that, while it doesn't increase your survivability, has a strong call that will increase your damage, along with its sub aura effect.
Morgana Car and
Sandalphon (Summon) are both summons with healing calls that were freely obtainable through past events. The first has a Defense down debuff for the enemy, while the second has an Attack up buff for your party.
Tiamat Omega at 4★ provides a single
Mirror ImageNext one-to-one attack received will be ineffective
(Effect removed on next all-foe all-ally attack)
for your party, which aids in mitigating incoming damage.Lucifer at 4★ has a massive 3000 heal and 30% Attack up that is always useful.
If a summon is not listed here, but has calls and effects the have similar roles, it is also useful. This is not meant to be a comprehensive list, so do not feel like you need to have all of these summons to clear the fight.
The Fight
Your damage will greatly affect how long this fight takes, but it is a balancing act of damage and survivability. The longer the fight takes, the more consistent your mitigation and sustain will need to be. The opposite is also true, so strong grids that do high damage are likely to be able to get away with riskier strategies.
It is worth noting that this is one of the easier 6-man bosses to solo. This is a combination of her charge attacks and their debuffs not being very threatening, the lack of dispels on your party, and the overall advantage Fire's characters have on her, which makes building a party to take against her much easier. Even in the later phases of the fight, as long as you are prepared with damage cuts, her attacks and abilities do not deal extreme amounts of damage, keeping damage levels consistent from beginning to end.
Mitigation is key. As mentioned above, you want to have close to 100% uptime on Carbuncles during Wind phase, meaning 100% uptime on at least a 50% cut. Characters who bring damage cuts, strong ones for single turns like Societte (Fire) and Naoise (Event), or longer duration ones with weaker effects like Io (Summer) and Zahlhamelina will always have a place. Since Rose Queen does not have any means to dispel your buffs, unlike many of the other 6 man raids, you don't have to worry about losing your Carbuncles at a bad time and failing the run as long as you pay attention to their duration.
Charge attacks to look out for include Spiral Rose (both Wind phases in Overdrive), Crystal Rose (Dark phase in Overdrive), and Domination Field (10% and 3% trigger, and past 10% in Overdrive). All of these attacks should have a bare minimum of 50% cut waiting for them, and in the case of Domination Field, a Clear or Veil. Being unprepared for the Domination Field debuff can force you to spend several turns healing her with your attacks and wasting your time. Spiral Rose should be drawn away and tanked by Hostility or Substitute characters like Agielba, Anthuria, or Naoise (Event), as it does a high amount of damage to a single target and could kill a valuable character if you aren't prepared, though having a high damage cut works just as well. If the attack is successfully dodged, the debuff associated with it will miss, saving you from having to clear it.
Sustain is your team's ability to weather damage and heal it off over the course of the fight. Since Dark phase can be long if your damage isn't very high, you have to be prepared to take a lot of Crystal Rose attacks in succession and then heal it off. Fire has no lack of characters who are good for this, such as Yuel, Anila, and Anthuria, the last of whom is very consistent about activating her buffs by dodging the many hits of Crystal Rose. You can adjust your main character's class to one that heals as needed, if sustain from your characters and summons don't meet your needs. Sevastien receives an honorable mention here: if you do not need your 5th character slot, his passive 150 Refresh per turn can add up greatly over many turns.
Sustain also goes hand in hand with debuffing. It is important to try and cap ATK DownATK is lowered
, since this will reduce how much damage you take overall, and capping DEF DownDEF is lowered
will help you end the fight quicker. Miserable MistInflict
25% ATK DownATK is lowered
Strength: 25%Base Accuracy: 80%Duration: 180 secondsStacking: Dual and 25% DEF DownDEF is lowered
Strength: 25%Base Accuracy: 80%Duration: 180 secondsStacking: Dual on all foes. on your main character or Magisa's Eruption200%-250% Fire damage to all foes (Damage cap: ~430,000).
Inflict 10% ATK DownATK is lowered
Strength: 10%Base Accuracy: 75%Duration: 180 secondsStacking: Dual.
At level 100:
Debuff increased to 25% ATK DownATK is lowered
Strength: 25%Base Accuracy: 90%Duration: 180 secondsStacking: Dual.
Also inflict 25% DEF DownDEF is lowered
Strength: 25%Base Accuracy: 90%Duration: 180 secondsStacking: Dual. can lay the groundwork, both being dual-sided 25% ATK/DEF Downs. From there you can add on with other characters' kits like Clarisse or Lancelot and Vane.
Unique utility can play a strong role in this fight as well. Percival's 60-second PetrifiedStops enemy's charge diamonds from filling.
right before entering Dark phase can give you free time to deal as much damage as possible and reset your cooldowns. 5★ Tien brings Break Boosted (Time)Break mode time is extended
on her second skill, which serves the same purpose for giving you a lot of time to do as you'd like against the boss in relative safety.