Unite and Fight/June 2026/Preparation
| Event | Preparation | Omega Grids | Optimus Grids |

Fire Favored
Wind Bosses
10:00 UTC, June 21, 202619:00 JST, June 21, 2026 - 14:59 UTC, June 28, 202623:59 JST, June 28, 2026
This page contains information on what to prepare in regards to the next Fire-favored Unite and Fight event, along with answers to frequently asked questions about the event.
Weapon-Related
How many of [x] weapon should I farm?
The specific number of weapon copies and Awakening needed can be found in the following sections on the Advanced Grid pages:
 Colossus Grids: Core Weapons |
 Agni Grids: Notable Farmable Weapons |
Which raids should I host daily?
Standard Raids
It is recommended that players daily host the following raids for their weapon drops and various other useful materials. Even if the host is not able to contribute meaningfully in these raids, they are still very likely to succeed.


Even though the Odious weapons and summons are not currently used in Optimus grids, players should still host the raids for future material usage.
Revans Raids
The following Revans raids are recommended to host. These will be more popular than usual due to the weapons and materials requred to Mk II Forge a weapon.


How many Revans Mk II weapons should I farm?


Forging a Mk II Revans weapon costs a large amount of materials. For this reason, Attack or Special awakening should be prioritized over Defense as the defensive gains are relatively minor.
A Mk II weapon is a strict upgrade over its Mk I counterpart. However, fully upgrading a Mk II weapon requires over five times the materials needed over its Mk I version. As such, extra caution should be taken when upgrading a weapon.
| Weapon | Copies | Notes |
|---|---|---|
  Extinction Blade Mk II |
|
|
  Mortality Bow Mk II |
|
|

Dark Opus Transcendence


Dark Opus Weapons gain small benefits on each step of its Transcendence process. For further details, check Advanced Grids#Dark Opus Transcendence.
At Lvl 210, Dark Opus Weapons can be equipped with 


At Lvl 230, Dark Opus Weapons gain an aura-boostable general damage amplification modifier.
At Lvl 250, the maximum skill level increases to Lvl 25. The charge attack is also upgraded to unworldly damage which may be useful in teams that use the Dark Opus as a main weapon, e.g. 
Draconic Weapon Provenance


Upon reforging Draconic Weapons into their Provenance forms, they can be equipped alongside Dark Opus Weapons. When equipped with 
In Nightmare Lvl 250 setups, upgraded Draconic weapons can be used in the additional slots in Party Set Extra teams, allowing for more gridbuilding options.
For players that have obtained 

Destroyer Weapons


Destroyer Weapons are an incredibly potent addition to grids for the offensive and defensive benefits they provide. These weapons can be equipped in the additional slots in Party Set Extra teams and they gain sizeable upgrades on each uncap.
- At 3★, the weapon only provides MC with Bonus Destruction DMG on normal attacks and charge attacks. It is unlikely to be used on this step.
- At 4★, the weapon now provides teamwide Bonus Destruction DMG on N.A. and C.A. Additionally, an Anklet can be equipped, however it will only affect MC. At this step, the weapon can be an upgrade in certain team setups.
- At 5★, the Bonus Destruction DMG value is increased and the Anklet now affects the entire team. At this step, this weapon is best-in-slot for all team setups. The anklet effect combines the Ultima Weapon's


Character-Related
Eternal Recruitment, Uncapping and Transcending
Check out Umikin's FAQ page for an idea of how each of the Eternals work and where they sit in the general recruitment priority.
Tien

- Tien is a powerful offensive character that excels in dealing both normal attack and skill damage. She is likely to be a strong option for Full Auto setups and may also be used in certain manual teams. However, she is unable to Dispel which is typically very useful against Nightmare raids.
| Lvl 100 |
|
| Lvl 130 |
|
| Lvl 150 |
|


Evoker Recruitment and Uncapping
Check out Umikin's FAQ page for an idea of how each of the Evokers work and where they sit in the general recruitment priority.
Fraux
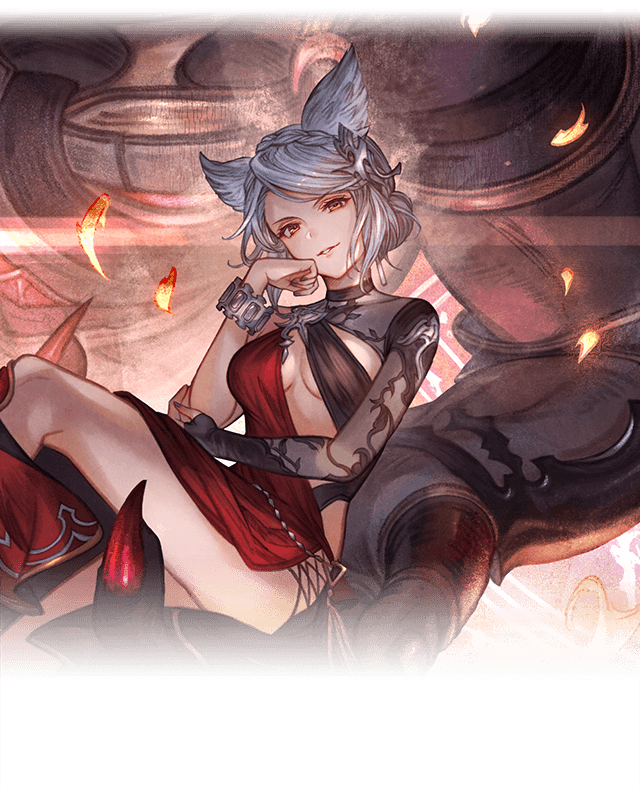
- Fraux is a strong Full Auto character that has seen usage both in and out of Guild War. She is typically used for her reliable Dispels and healing that she provides to the team.
| Lvl 80 |
|
| Lvl 100 |
|


Alanaan

- 5★ Alanaan with


Duration: 1 turn and
Strength: 100% chance of dealing 20% more damage.Duration: 4 turns.
Activate

Strength: 100%Duration: 4 turns and
Strength: 30%Duration: 4 turnsStacking: A.
Inflict
Duration: 4 turns on all allies.
(Consumes 100% of all allies' charge bar.).
(Can only be used after
All Fire allies gain
Strength: 50% DEF Up / 25% of damage dealt (Healing cap: 800)Duration: Indefinite.
(Can't be reactivated.)
At level 95:
Strength: 50% DEF Up / 25% of damage dealt (Healing cap: 800)Duration: Indefinite upgraded to
Strength: 100% DEF Up / 25% of damage dealt (Healing cap: 1600)Duration: Indefinite.
Also activate
(
Strength: 20% ATK Up / 25% DEF DownMultiplier: UniqueDuration: 8 turnsField effect
Local status effect to the field.).
(Can't be reactivated.) activates.) unlocked is a powerful normal attack burst character. However since he needs to be brought in from the backline, he tends to be used in less optimized teams or only when the large amount of firepower he brings is necessary.


| Lvl 80 |
|
| Lvl 100 |
|


Characters to Level Up and EMP
The following is a curated list of characters obtained from the Premium Draw that are likely to see usage in the upcoming Unite and Fight.
| Criteria | Examples |
|---|---|
|
Skill Damage One-Turn-Kill (OTK) characters:
|
|
|
Charge Attack One-Turn-Kill (OTK) characters:
|
|
|
Normal Attack One-Turn-Kill (OTK) characters:
|
|
|
Manual burst characters:
|
|
|
Charge Attack characters:
|
|
|
Full Auto characters:
|


















































Classes to Unlock and Master
The following is a curated list of MC Classes that are likely to see usage in the upcoming Unite and Fight. Some of the classes may require their Ultimate Mastery to be effective so make sure to check the Class Assessment sections found on the respective Class page for more information.


Team Setups
Team setups can be found in the following sections on the Advanced Grid pages. More will be added as Guild War approaches.
Colossus Grids: Unite and Fight Setups |
Agni Grids: Unite and Fight Setups |
Testing Setups
Horde setups can be tested in Trial Battles. This dummy boss has the same stats as the U&F battle.


Extreme+ setups can be tested in Trial Battles. This dummy boss has the same stats as the U&F Extreme+ boss.
| Testing Extreme+ (Fire Favored) | ||
| Defeat the Trial Lignoid in one turn with as few buttons as possible! | ||
| ||

Nightmare Lvl 90 setups can be tested against the solo quest version of Ewiyar.
Remember to turn off the  |
| Testing Nightmare Lvl 90 | ||
72%
|
Get the boss down to 72.22% HP. (Note: This quest has 15 DEF, while NM Lvl 90 has 14 DEF.) |
|
| ||
Nightmare Lvl 150 setups can be tested in the following raid. Try it out in a Trial Co-Op room if you wish to preserve daily raid hosts.
| Remember to turn off the |
| Testing Nightmare Lvl 150 | ||
70%
|
Get the boss down to 69.92% HP. (Note: This raid effectively has 24 DEF at battle start, while NM Lvl 150 has 25 DEF.) |
|
| ||

Nightmare Lvl 200 setups can be tested in the following raid. Try it out in a Trial Co-Op room if you wish to preserve daily raid hosts.
| Remember to turn off the |
| Testing Nightmare Lvl 200 | ||
9%
|
Get the boss down to 8.59% HP. (Note: This raid effectively has 24 DEF at battle start, while NM Lvl 150 has 25 DEF.) |
|
| ||
FAQ
Nightmare Boss Quick Reference Table
| Raid | Availability | DEF | HP |
|---|---|---|---|
| NM90 | Always | 14 | 50,000,000 |
| NM95 | Always | 15 | 131,250,000 |
| NM100 | Finals Day 1 | 15 | 288,750,000 |
| NM150 | Finals Day 1 | 25 | 288,750,000 |
| NM200 | Finals Day 2 | 25 | 877,800,000 |
| NM250 | Finals Day 3 | 25 | 2,326,170,000 |
What Nightmare Difficulty should I farm?
Choosing which Nightmare Difficulty to farm will come down to what your goal is. If you want Celestial Weapons, you will want to farm Nightmare Lvl 90, whereas if you want more honors, farming the highest Nightmare difficulty available will yield the best meat/time to honor ratio.
However, if the more difficult fights are taking too long to kill or are too difficult to clear, moving to a lower difficulty may provide better results.
Use the calculator below to figure out which fight is most efficient for honor gain. Don't forget to also consider the time taken to menu in between fights.
| Raid | Honors | Minutes | Seconds | Honors per Hour |
|---|---|---|---|---|
| EX+ | 127,600 | N/A | ||
| NM90 | 310,000 | N/A | ||
| NM95 | 910,000 | N/A | ||
| NM100 | 2,650,000 | N/A | ||
| NM150 | 4,100,000 | N/A | ||
| NM200 | 20,250,000 | N/A | ||
| NM250 | 75,250,000 | N/A |
How to get Chests of Good Fortune
You can obtain a total of 60 Chests of Good Fortune per event. 10 can be obtained from the Event missions. The remaining 50 can be farmed from the following quests:
- Nightmare Lvl 95 (Host only)
- Nightmare Lvl 100 (Host only)
- Nightmare Lvl 150
- Nightmare Lvl 200
- Nightmare Lvl 250
If you are struggling to find all 50 chests, farming Nightmare Lvl 95 is recommended as it is the easiest and fastest quest to clear.
How do I farm Celestial Weapons?
Celestial Weapons drop from every Nightmare fight. Although the drop chance gradually increases per Nightmare difficulty lvl, the quickest way to get Celestial Weapons is to farm Nightmare Lvl 90 as the fights are very short.
You will want to stack as much Drop Rate Boosts as you can without significantly slowing down your setup. Further information on specific drop rates can be found in the section below.
Understanding Drop Rate Boosts
Many players will opt to run extra Drop Rate Boosts when farming Extreme+ and Nightmare Lvl 90 as it will increase the chances that a chest with Bait Chunks or Celestial Weapons will appear. It is important to note that Drop Rate Boosts cap at 300%. See Drop Rate Boosts for further information.


Key Takeaways:
- Campaign i.e. Magfest, can double or quadruple the effects of Journey Drops.
- The extra chests containing Bait Chunks are guaranteed at 167% Total Drop Rate (×1.67)[3][4]
- With Crew Buffs and Journey Drops, only a single

- If Journey Drop effects are quadrupled, only 5★

- If you have Premium Pass and Journey Drop effects are doubled, only 5★
- With Crew Buffs and Journey Drops, only a single
- The extra chest containing Celestial Weapons cannot be guaranteed even if capping Drop Rate Boosts.








































































Quick Reference Table:
| Crew Buff | Journey Drops | Drop Rate Sources | Total Drop Rate | Base Celestial Chance | Celestial Drop Rate | ||||||||
|---|---|---|---|---|---|---|---|---|---|---|---|---|---|
 1.2 |
× |  1.1 |
× |  0.3 |
0.3 |
 0.1 |
Total 1.7 |
= | 224% | × | 0.156% | = | 0.349% |
| × | 0.3 |
0.3 |
Total 1.6 |
211% | 0.329% | ||||||||
| × | 0.3 |
0.1 |
Total 1.4 |
185% | 0.289% | ||||||||
| × | 0.3 |
Total 1.3 |
172% | 0.268% | |||||||||
| × | 0.1 |
Total 1.1 |
145% | 0.226% | |||||||||



| Crew Buff | Journey Drops | Drop Rate Sources | Total Drop Rate | Base Celestial Chance | Celestial Drop Rate | ||||||||
|---|---|---|---|---|---|---|---|---|---|---|---|---|---|
1.2 |
× | 1.15 |
× | 0.3 |
0.3 |
0.1 |
Total 1.7 |
= | 235% | × | 0.156% | = | 0.367% |
| × | 0.3 |
0.3 |
Total 1.6 |
221% | 0.345% | ||||||||
| × | 0.3 |
0.1 |
Total 1.4 |
193% | 0.301% | ||||||||
| × | 0.3 |
Total 1.3 |
179% | 0.279% | |||||||||
| × | 0.1 |
Total 1.1 |
152% | 0.237% | |||||||||
| Crew Buff | Journey Drops | Drop Rate Sources | Total Drop Rate | Base Celestial Chance | Celestial Drop Rate | ||||||||
|---|---|---|---|---|---|---|---|---|---|---|---|---|---|
1.2 |
× | 1.2 |
× | 0.3 |
0.3 |
0.1 |
Total 1.7 |
= | 245% | × | 0.156% | = | 0.382% |
| × | 0.3 |
0.3 |
Total 1.6 |
230% | 0.359% | ||||||||
| × | 0.3 |
0.1 |
Total 1.4 |
202% | 0.314% | ||||||||
| × | 0.3 |
Total 1.3 |
187% | 0.292% | |||||||||
| × | 0.1 |
Total 1.1 |
158% | 0.247% | |||||||||
| Crew Buff | Journey Drops | Drop Rate Sources | Total Drop Rate | Base Celestial Chance | Celestial Drop Rate | ||||||||
|---|---|---|---|---|---|---|---|---|---|---|---|---|---|
1.2 |
× | 1.3 |
× | 0.3 |
0.3 |
0.1 |
Total 1.7 |
= | 265% | × | 0.156% | = | 0.414% |
| × | 0.3 |
0.3 |
Total 1.6 |
250% | 0.389% | ||||||||
| × | 0.3 |
0.1 |
Total 1.4 |
218% | 0.341% | ||||||||
| × | 0.3 |
Total 1.3 |
203% | 0.316% | |||||||||
| × | 0.1 |
Total 1.1 |
172% | 0.268% | |||||||||
| Crew Buff | Journey Drops | Drop Rate Sources | Total Drop Rate | Base Celestial Chance | Celestial Drop Rate | ||||||||
|---|---|---|---|---|---|---|---|---|---|---|---|---|---|
1.2 |
× | 1.4 |
× | 0.3 |
0.3 |
0.1 |
Total 1.7 |
= | 286% | × | 0.156% | = | 0.446% |
| × | 0.3 |
0.3 |
Total 1.6 |
269% | 0.420% | ||||||||
| × | 0.3 |
0.1 |
Total 1.4 |
235% | 0.367% | ||||||||
| × | 0.3 |
Total 1.3 |
218% | 0.340% | |||||||||
| × | 0.1 |
Total 1.1 |
185% | 0.289% | |||||||||
| Crew Buff | Journey Drops | Drop Rate Sources | Total Drop Rate | Base Celestial Chance | Celestial Drop Rate | ||||||||
|---|---|---|---|---|---|---|---|---|---|---|---|---|---|
1.2 |
× | 1.6 |
× | 0.3 |
0.3 |
0.1 |
Total 1.7 |
= | 300% | × | 0.156% | = | 0.468% |
| × | 0.3 |
0.3 |
Total 1.6 |
300% | 0.468% | ||||||||
| × | 0.3 |
0.1 |
Total 1.4 |
269% | 0.420% | ||||||||
| × | 0.3 |
Total 1.3 |
250% | 0.390% | |||||||||
| × | 0.1 |
Total 1.1 |
211% | 0.329% | |||||||||
| Boost sources | Total | |
|---|---|---|
| Target | Expected | |
| % | ||
| % | ||
References
- ↑ otokuro EX+, https://x.com/otokuro2/status/1836976826071273759
- ↑ otokuro NM90, https://x.com/otokuro2/status/1835680834705314137
- ↑ 19gb96, https://x.com/19gb96/status/1853758577892291051
- ↑ 19gb96, https://x.com/19gb96/status/1830931243774468548