Unite and Fight/April 2025/Preparation
| Event | Preparation | Omega Grids | Optimus Grids |

Light Favored
Dark Bosses
10:00 UTC, April 7, 202519:00 JST, April 7, 2025 - 14:59 UTC, April 14, 202523:59 JST, April 14, 2025
This page contains frequently asked questions regarding preparation for the next Light-favored Unite and Fight event. It is assumed that Players are at least rank 151 and above and that they have completed Sierokarte's Knickknack Academy.
Weapon-Related
How many of [x] weapon should I farm?
The specific number of weapon copies and Awakening needed can be found in the following sections on the Advanced Grid pages:
 Luminiera Grids: Core Weapons |
 Zeus Grids: Notable Farmable Weapons |
Which raids should I host daily?
It is recommended that players daily host the following raids for their weapon drops and various other useful materials:


Even if the host is not able to contribute in these raids, they are still very likely to succeed. In particular, the Revans Raids listed above have a higher population than usual due to the weapons and materials required to Mk II Forge a weapon.


How many Revans Mk II weapons should I farm?


Forging a Mk II Revans weapon costs a large amount of materials. For this reason, only weapons that are Attack or Special awakened are recommended to Mk II. The additional stats Defense brings is generally not necessary.
A Mk II weapon is a strict upgrade over its Mk I counterpart. However, fully upgrading a Mk II weapon requires over five times the materials needed over its Mk I version. As such, extra caution should be taken when upgrading a weapon.
| Weapon | Copies | Notes |
|---|---|---|
  Symmetria Mk II |
|
|
  Concordia Mk II |
|
|


Should I uncap the New World Foundation weapon?
Uncapping a New World Foundation Weapon is a necessary step in Uncapping Evokers. The information below will discuss the weapon's potential usecases as a grid weapon. Check #Evoker Recruitment and Uncapping for more details on the characters themselves.
All New World Foundation Weapons at 5★ provide an EX ATK modifier, 5% DMG Cap and an additional effect unique to each weapon.
| Weapon | Unique Skill | Notes |
|---|---|---|
 Shooting of The Star |
 Chariot-Star's WishMassive boost to Light allies' ATKModifier: EX. 20% Bonus Light DMG effect to Light allies with  . |
|

Dark Opus Transcendence





Dark Opus Weapons gain small benefits on each step of its Transcendence process. For further details, check Advanced Grids#Dark Opus Transcendence.
At Lvl 210, Dark Opus Weapons can be equipped with 

At Lvl 230, Dark Opus Weapons gain an aura-boostable general damage amplification modifier.
At Lvl 250, the charge attack is upgraded to unworldly damage. As a result, it may see use as a main weapon for charge attack setups and for manual burst rotations with 


Draconic Weapon Provenance


Upon reforging Draconic Weapons into their Provenance forms, they can be equipped alongside Dark Opus Weapons. When equipped with 
Character-Related
Eternal Recruitment, Uncapping and Transcending
| Character | Level Breakpoint(s) | Notes |
|---|---|---|
Tweyen |
Lvl 100 |
Notable upgrades:
Can be used in more budget Full Auto teams for lower Nightmare difficulties. |
| Lvl 110 |
Notable upgrades:
Becomes a much more potent skill damage dealer for longer Full Auto fights. Will also provide higher uptime on | |
| Lvl 150 |
Notable upgrades:
Gains reliable multiattack rate which will be helpful in increasing | |
Fif |
Lvl 100 |
Notable upgrades:
Starts the battle with |
| Lvl 150 |
Notable upgrades:
Gains an Unworldly modifier on Charge Attack, greatly improving her damage output for Charge Attack oriented teams. Alongside other upgrades gained at earlier uncap levels, she becomes a potent support for these archetypes. Gains a way to autocast |


Evoker Recruitment and Uncapping
Check out Umikin's FAQ page for an idea of how each of the Evokers work and where they sit in the general recruitment priority.
The following table will discuss 
| Character | Level | Notes |
|---|---|---|
Geisenborger |
Lvl 80 |
|
| Lvl 100 |
|


Characters to Level Up and EMP
The following is a curated list of characters obtained from the Premium Draw that are likely to see usage in the upcoming Unite and Fight.
| Criteria | Examples |
|---|---|
|
Skill Damage One-Turn-Kill (OTK) characters:
|
|
|
Charge Attack One-Turn-Kill (OTK) characters:
|
|
|
Normal Attack One-Turn-Kill (OTK) characters:
|
|
|
Manual burst characters:
|
|
|
Charge Attack characters:
|
|
|
Full Auto characters:
|

















































Classes to Unlock and Master
The following is a curated list of MC Classes that are likely to see usage in the upcoming Unite and Fight. It is recommended to fully unlock Ultimate Masteries for the classes listed if available.


Testing Setups
Extreme+ setups can be tested in Trial Battles. This dummy boss has the same stats as the U&F Extreme+ boss.
| Testing Extreme+ (Light Favored) | ||
| Defeat the Trial Lignoid in one turn with as few buttons as possible! | ||
| ||


Nightmare Lvl 90 setups can be tested against the Proud version of Gilbert.
Remember to turn off 
| Testing Nightmare Lvl 90 | ||
72%
|
Get the boss down to 72.22% HP. (Note: This quest has 15 DEF, while NM Lvl 90 has 14 DEF.) |
|
| ||

Nightmare Lvl 95 setups can be tested against the Proud version of Gilbert.
Remember to turn off
| Testing Nightmare Lvl 95 | ||
27%
|
Get the boss down to 27.08% HP. | |
| ||
Nightmare Lvl 100 setups can be tested in the following raid. Try it out in a Trial Co-Op room if you wish to preserve daily raid hosts.
Remember to turn off
| Testing Nightmare Lvl 100 | ||
52%
|
Get the boss down to 51.88% HP. (Note: This raid's hardcap is 13m while NM100 has a 6.6m hardcap.) |
|
| ||

Nightmare Lvl 150 setups can be tested in various raids. Try it out in a Trial Co-Op room if you wish to preserve daily raid hosts.
Remember to turn off
| Testing Nightmare Lvl 150 | ||
52%
|
Get the boss down to 51.88% HP. (Note: This quest has 15 DEF, while NM Lvl 150 has 25 DEF. This raid's hardcap is 13m while NM100 has a 6.6m hardcap.) |
|
| ||
| Testing Nightmare Lvl 150 | ||
42%
|
Get the boss down to 42.25% HP. (Note: This quest has 12 DEF, while NM Lvl 150 has 25 DEF. Testing damage against an undebuffed Avatar will be approximately the same as a fully debuffed NM150.) |
|
| ||
FAQ
Understanding Drop Rate Boosts
Many players will opt to run extra Drop Rate Boosts when farming Extreme+ and Nightmare Lvl 90 as it will increase the chances that a chest with Bait Chunks or Celestial Weapons will appear. It is important to note that Drop Rate Boosts cap at 300%. See Drop Rate Boosts for further information.


Key Takeaways:
- Campaign i.e. Magfest, can double or quadruple the effects of Journey Drops.
- The extra chests containing Bait Chunks are guaranteed at 167% Total Drop Rate (×1.67)[3][4]
- With Crew Buffs and Journey Drops, only a single

- If Journey Drop effects are quadrupled, only 5★

- If you have Premium Pass and Journey Drop effects are doubled, only 5★
- With Crew Buffs and Journey Drops, only a single
- The extra chest containing Celestial Weapons cannot be guaranteed even if capping Drop Rate Boosts.















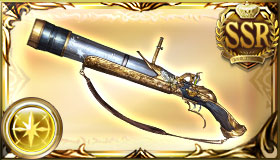




























































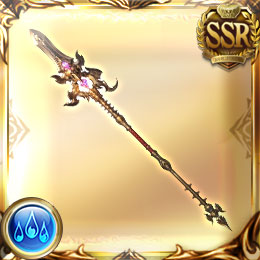






Quick Reference Table:
| Crew Buff | Journey Drops | Drop Rate Sources | Total Drop Rate | Base Celestial Chance | Celestial Drop Rate | ||||||||
|---|---|---|---|---|---|---|---|---|---|---|---|---|---|
 1.2 |
× |  1.1 |
× |  0.3 |
0.3 |
 0.1 |
Total 1.7 |
= | 224% | × | 0.156% | = | 0.349% |
| × | 0.3 |
0.3 |
Total 1.6 |
211% | 0.329% | ||||||||
| × | 0.3 |
0.1 |
Total 1.4 |
185% | 0.289% | ||||||||
| × | 0.3 |
Total 1.3 |
172% | 0.268% | |||||||||
| × | 0.1 |
Total 1.1 |
145% | 0.226% | |||||||||



| Crew Buff | Journey Drops | Drop Rate Sources | Total Drop Rate | Base Celestial Chance | Celestial Drop Rate | ||||||||
|---|---|---|---|---|---|---|---|---|---|---|---|---|---|
1.2 |
× | 1.15 |
× | 0.3 |
0.3 |
0.1 |
Total 1.7 |
= | 235% | × | 0.156% | = | 0.367% |
| × | 0.3 |
0.3 |
Total 1.6 |
221% | 0.345% | ||||||||
| × | 0.3 |
0.1 |
Total 1.4 |
193% | 0.301% | ||||||||
| × | 0.3 |
Total 1.3 |
179% | 0.279% | |||||||||
| × | 0.1 |
Total 1.1 |
152% | 0.237% | |||||||||
| Crew Buff | Journey Drops | Drop Rate Sources | Total Drop Rate | Base Celestial Chance | Celestial Drop Rate | ||||||||
|---|---|---|---|---|---|---|---|---|---|---|---|---|---|
1.2 |
× | 1.2 |
× | 0.3 |
0.3 |
0.1 |
Total 1.7 |
= | 245% | × | 0.156% | = | 0.382% |
| × | 0.3 |
0.3 |
Total 1.6 |
230% | 0.359% | ||||||||
| × | 0.3 |
0.1 |
Total 1.4 |
202% | 0.314% | ||||||||
| × | 0.3 |
Total 1.3 |
187% | 0.292% | |||||||||
| × | 0.1 |
Total 1.1 |
158% | 0.247% | |||||||||
| Crew Buff | Journey Drops | Drop Rate Sources | Total Drop Rate | Base Celestial Chance | Celestial Drop Rate | ||||||||
|---|---|---|---|---|---|---|---|---|---|---|---|---|---|
1.2 |
× | 1.3 |
× | 0.3 |
0.3 |
0.1 |
Total 1.7 |
= | 265% | × | 0.156% | = | 0.414% |
| × | 0.3 |
0.3 |
Total 1.6 |
250% | 0.389% | ||||||||
| × | 0.3 |
0.1 |
Total 1.4 |
218% | 0.341% | ||||||||
| × | 0.3 |
Total 1.3 |
203% | 0.316% | |||||||||
| × | 0.1 |
Total 1.1 |
172% | 0.268% | |||||||||
| Crew Buff | Journey Drops | Drop Rate Sources | Total Drop Rate | Base Celestial Chance | Celestial Drop Rate | ||||||||
|---|---|---|---|---|---|---|---|---|---|---|---|---|---|
1.2 |
× | 1.4 |
× | 0.3 |
0.3 |
0.1 |
Total 1.7 |
= | 286% | × | 0.156% | = | 0.446% |
| × | 0.3 |
0.3 |
Total 1.6 |
269% | 0.420% | ||||||||
| × | 0.3 |
0.1 |
Total 1.4 |
235% | 0.367% | ||||||||
| × | 0.3 |
Total 1.3 |
218% | 0.340% | |||||||||
| × | 0.1 |
Total 1.1 |
185% | 0.289% | |||||||||
| Crew Buff | Journey Drops | Drop Rate Sources | Total Drop Rate | Base Celestial Chance | Celestial Drop Rate | ||||||||
|---|---|---|---|---|---|---|---|---|---|---|---|---|---|
1.2 |
× | 1.6 |
× | 0.3 |
0.3 |
0.1 |
Total 1.7 |
= | 300% | × | 0.156% | = | 0.468% |
| × | 0.3 |
0.3 |
Total 1.6 |
300% | 0.468% | ||||||||
| × | 0.3 |
0.1 |
Total 1.4 |
269% | 0.420% | ||||||||
| × | 0.3 |
Total 1.3 |
250% | 0.390% | |||||||||
| × | 0.1 |
Total 1.1 |
211% | 0.329% | |||||||||
| Boost sources | Total | |
|---|---|---|
| Target | Expected | |
| % | ||
| % | ||
References
- ↑ otokuro EX+, https://x.com/otokuro2/status/1836976826071273759
- ↑ otokuro NM90, https://x.com/otokuro2/status/1835680834705314137
- ↑ 19gb96, https://x.com/19gb96/status/1853758577892291051
- ↑ 19gb96, https://x.com/19gb96/status/1830931243774468548