Advanced Grids
New Players: Starting Granblue Fantasy | Creating an Account | Rerolling
Beginner Missions and Draws: Sierokarte's Knickknack Academy | Skyscope | New Skyfarer Step Up Special | Beginner's Draw Set
Wiki Resources: FAQ | Recurring Tasks | Basic Grids | Advanced Grids | Glossary | Guides | Town Items | Optimizing Performance
Advanced Grids is a comprehensive guide for experienced players looking to optimize their weapon grids for various content. Early game players should start with Basic Grids and Sierokarte's Knickknack Academy to build a foundational grids before exploring this page. Players are assumed to be at least rank 151 and above.
 |
Got a question? Check out the Advanced Grids FAQ! If you're looking to submit a setup, also have a look through the Manual of Style before doing so. |
Element Subpages
The following subpages provide comprehensive advice on grid weapons, team configurations, and grid compositions to explore. As not every setup may match your available weapons, characters, or summons, it's important to test these configurations using your own resources. This process of experimentation is essential for finding the most effective strategies for your gameplay.
| |||||


Finding Reference Material
Often the best way to start creating a setup for a specific fight is to see what your fellow players are doing. While Advanced Grids aims to collect a good amount of setups for reference, there's only so many that can reasonably fit within the wiki's standards.
The most common starting place for researching alternatives is YouTube. You can use the generator below to help with the Japanese text for searching.
| Content | |
| Element | |
| Class | |
| "Granblue" | |
| Omega | |
| Blue Chest | |
| Full Auto | |
| Solo | |
| Honors | |
Notes
- Use Honors for finding specific Blue Chest setups (e.g., a Revans raid setup would specify 4m for 4 million honors).
- The Solo field is primarity used for high difficulty / 6-man raids. Using it on lower raids may give inconsistent results.
- The Element field can be ignored if the selected raid does not involve different player elements.


 |
Other resources to check...
Note: The above websites are not affiliated with the Granblue Fantasy Wiki, nor were the grids contained within tested by wiki staff.
|
Building Different Types of Grids
Since there is a limited amount of room in your grid, it is important to adjust it depending on what characters are in your party and what type of content you are bringing them to. Listed below are common ways grids can optimize their damage output.
Players should note that Optimus weapons should not be used in Omega grids unless otherwise specified.
Weapon Skill Calculator
Check Weapon Skills for a list of weapon skill values.
Common Grid Components
Check the tabs below to see more details on the different components that make up a grid.












Aura Boost & Exalto
Aura boosting is often an essential part of building optimized grids due to the 280% threshold present on certain weapon skills. This can be achieved through the use of summon auras & sub auras, character passives and the Exalto weapon skill.
Exalto weapons boost the aura of Omega, Odious, or Optimus weapon skills. For example, 


Exalto Weapons
| Omega Exalto Weapons | ||||||
|---|---|---|---|---|---|---|
20% per Weapon (Max: 100%) - 5 copies | ||||||
| Optimus Exalto Weapons | ||||||
30% per Weapon (Max: 90%) - 3 copies | ||||||
| Odious Exalto Weapons | ||||||
25% per Weapon (Max: 100%) - 4 copies |


Additional Aura Boost Sources
All sources below stack with each other within the same element.
| Character Passives | |||||||||||||
|---|---|---|---|---|---|---|---|---|---|---|---|---|---|
20% boost to Omega and Optimus skills. |
10% boost to Omega skills ONLY. | ||||||||||||
| Sub Aura Summons | |||||||||||||
Up to 40% boost to Optimus skills ONLY. |
30% boost to Omega skills ONLY. | ||||||||||||


Aura Boost Thresholds


Stacking Exalto weapons is often used as a means to reach the 280% aura boost requirements from items such as 


Single-sided Omega example:
| + |  |Transcendence Lvl 5 |
+ | = 280% | ||
| (20% × 4 = 80%) | 170% | 30% |


| + |  |
+ |  |Transcendence Lvl 5 |
+ | = 280% | ||
| (20% × 3 = 60%) | 20% | 170% | 30% |

Single-sided Optimus example:
| + |  |
+ |  |Transcendence Lvl 5 |
+ | = 290% | ||
| (30% × 2 = 60%) | 20% | 170% | 40% |


| + |  |Transcendence Lvl 5 |
+ | = 280% | ||
| (30% × 3 = 90%) | 170% | ≥20% |



Ways To Increase Damage Output
Utilizing weapons that allow damage to exceed the damage cap is a core aspect of building optimized grids. This is primarily done through weapon skills that provide the following:
- DMG Cap Up / DMG Cap Up (Special)
- Supplemental Damage
- DMG Amplify
This section covers sources that provide the above bonuses to all types of damage. For sources that specifically affect normal attack, skill damage and charge attack, refer to the corresponding tabs.
DMG Cap
The simplest way to increase damage output is by increasing general DMG cap. This bonus stacks up to a maximum of 20% and any excess will be converted into DMG Cap Penetration via the Overskills system. Keep in mind that increasing DMG Cap is only beneficial if you are hitting the damage cap.
There are many sources that provide DMG Cap and meta weapon options will often also provide other desirable modifiers as well.
| Notable Farmable DMG Cap Sources | ||||||||
|---|---|---|---|---|---|---|---|---|
|
| |||||||
| Notable Premium DMG Cap Sources | ||||||||
| ||||||||


DMG Cap (Special)
Special DMG Cap functions identically as regular DMG Cap, but uses a separate frame and has its own independent maximum of 20%. This means that grids using both regular DMG Cap and Special DMG Cap can have up to effectively 40% DMG Cap Up. Like regular DMG Cap, any excess will be converted into DMG Cap Penetration via the Overskills system.
| Notable Farmable DMG Cap (Special) Sources | |||||||
|---|---|---|---|---|---|---|---|
| |||||||
| Notable Premium DMG Cap (Special) Sources | |||||||
|


General Supplemental DMG
General supplemental damage adds a flat amount of damage to all damage sources. As a result, it is especially effective for setups with many damage instances, such as normal attack focused teams that stack 
or for setups with a lot of multi-hit skill damage.
Different weapons provide various skills that all fall under general supplemental damage. These effects stack with one another up to a maximum of 100,000. The most common skills are listed below:
- Pact: 50,000 unconditional supplemental damage
- Craft: 20,000 supplemental damage only applied on critical hits
- Persistence: Up to 30,000 staminaScales based on how high a character's HP is-based supplemental damage
- Fortitude: Up to 60,000 enmityScales based on how low a character's HP is-based supplemental damage

| Notable Farmable Supplemental Sources | ||||||||||
|---|---|---|---|---|---|---|---|---|---|---|
| ||||||||||
| Notable Premium Supplemental Sources | ||||||||||
|


DMG Amplify
The DMG Amplify modifier applies a percentage increase to your final damage. This bonus is additive with any other weapons or effects that provide damage amplification such as Arcarum Summons and the Seraphic-ATK modifier found on Seraphic Weapons, Ultima Weapons and Destroyer Weapons.
| Notable Farmable DMG Amp. Sources | |||||||
|---|---|---|---|---|---|---|---|
|
Lvl 230+ Dark Opus | ||||||


Ways To Increase Normal Attack DMG
Increasing Normal Attack DMG is achieved mostly through weapon skills that provide the following:
- Normal Attack DMG Cap Up
- Normal Attack Bonus DMG (commonly referred to as Echo)
- Normal Attack Supplemental DMG
- Normal Attack Amplify
Normal Attack DMG Cap Up
Normal Attack DMG Cap Up stacks up to a maximum of 20%.
| Notable Farmable N.A. Cap Sources | |||||||||
|---|---|---|---|---|---|---|---|---|---|
| |||||||||
| Notable Premium N.A. Cap Sources | |||||||||
|


Normal Attack Bonus DMG
Some weapon skills may provide allies with Bonus DMG (commonly referred to as echoes) to normal attacks. All weapons that grant Bonus DMG provide Bonus DMG corresponding to the weapon's element, with the exception of Destroyer Weapons. Depending on the weapon, this effect may only activate under specific conditions. If there multiple weapons provide Bonus DMG of the same element, only the highest value will apply.
Unlike C.A. Bonus DMG and Skill Bonus DMG, Normal Attack Supplemental DMG is added to each instance of Normal Attack Bonus DMG, making these two modifiers particularly valuable for normal attack setups.
| Notable N.A. Bonus DMG Sources | |||
|---|---|---|---|
| |||
| Notable Premium N.A. Bonus DMG Sources | |||
|


Normal Attack Supplemental DMG
Normal Attack Supplemental (N.A. Supp.) and N.A. Supp. (Sp.) function identically, with each stacking independently up to maximum of 100,000. Because this amount is added to each normal attack damage instance, it is particularly effective in setups that stack
or utilize Flurry. Normal Attack Supplemental DMG can be used alongside General Supplemental DMG, further enhancing this playstyle.
| Notable Farmable N.A. Supplemental (Sp.) Sources | ||||
|---|---|---|---|---|
| ||||
| Notable Premium N.A. Supplemental Sources | ||||
|


Normal Attack Amplify
Normal Attack Amplify (N.A. Amp.) and N.A. Amp. (Sp.) function identically with each stacking independently up to a maximum of 30% and 20% respectively. This modifier applies a percentage increase to your final normal attack damage, before supplemental damage is added. This bonus is additive with any other weapons or effects that provide damage amplification such as Arcarum Summons and the Seraphic-ATK modifier found on Seraphic Weapons, Ultima Weapons and Destroyer Weapons.
| Notable Farmable N.A. Amp. Sources | |||||
|---|---|---|---|---|---|
| Notable Farmable N.A. Amp. (Sp.) Sources | |||||
| |||||
| Notable Premium N.A. Amp. (Sp.) Sources | |||||
|

Ways To Increase Skill DMG
Increasing Skill DMG is achieved mostly through weapon skills that provide the following:
- Skill DMG Cap Up
- Skill DMG Supplemental
- Skill Bonus DMG (commonly referred to as Echo)
- Skill DMG Amplify
Skill DMG Cap Up
Skill DMG Cap and Skill DMG Cap (Sp.) function identically with each stacking independently up to a maximum of 100% and 60% respectively.
| Notable UnboostableWeapons that have skills that cannot be boosted by any summon aura. Skill DMG Cap Sources | ||||||||||||||
|---|---|---|---|---|---|---|---|---|---|---|---|---|---|---|
| ||||||||||||||
| Notable Boostable Skill DMG Cap Sources | ||||||||||||||
Boosted by Optimus aura. |
Boosted by Omega aura.
Boosted by Odious aura. | |||||||||||||
| Notable Farmable Skill DMG Cap (Sp.) Sources | ||||||||||||||
| ||||||||||||||
| Notable Premium Skill DMG Cap (Sp.) Sources | ||||||||||||||
| ||||||||||||||


Skill DMG Supplemental
Skill DMG Supplemental (Skill DMG Supp.) and Skill Supp. (Sp.) function identically, stacking independently of each other. Skill DMG Supp. stacks up to a maximum of 100,000. Because this amount is added to each instance of skill damage, it is most effective on characters that deal multi-hit skill damage. Skill DMG Supplemental can be used alongside General Supplemental DMG, further enhancing this playstyle.
| Notable UnboostableWeapons that have skills that cannot be boosted by any summon aura. Skill Supplemental Sources | |||||||||||
|---|---|---|---|---|---|---|---|---|---|---|---|
|
| ||||||||||
| Notable Boostable Skill Supplemental Sources | |||||||||||
Boosted by Optimus aura. |
Boosted by Omega aura.
Boosted by Odious aura. | ||||||||||
| Notable Skill Supplemental (Sp.) Sources | |||||||||||
| |||||||||||


Bonus Skill DMG
Rigor is a weapon skill that adds an additional instance of skill damage whenever skill damage is dealt to a foe. This extra instance deals a percentage of the total skill damage inflicted. For example, with 10% Rigor, if a skill deals 6 hits of 1,000,000 damage, an additional skill hit of 600,000 damage will be triggered.

| Notable Bonus Skill DMG Sources | |
|---|---|
|
Skill DMG Amplify
Skill DMG Amplify (Skill Amp.) and Skill Amp (Sp.) function identically, stacking independently of each other. Skill Amp (Sp.) stacks up to a maximum of 20%. This modifier applies a percentage increase to your final skill damage. This bonus is additive with any other weapons or effects that provide damage amplification such as Arcarum Summons and the Seraphic-ATK modifier found on Seraphic Weapons, Ultima Weapons and Destroyer Weapons.
| Notable Farmable Skill Amp. Sources | ||
|---|---|---|
| Notable Farmable Skill Amp. (Sp.) Sources | ||
| ||
| Notable Premium Skill Amp. (Sp.) Sources | ||
|
Ways To Increase Charge Attack DMG
Increasing Charge Attack DMG is achieved mostly through weapon skills that provide the following:
- Charge Attack DMG Cap Up
- Special Charge Attack DMG Cap Up
- Charge Attack Supplemental DMG
- Charge Attack Bonus DMG (commonly referred to as Echo)
- Charge Attack DMG Amplify
- Chain Burst Cap Up
- Chain Burst DMG Amplify
Charge Attack DMG Cap Up
Charge Attack DMG Cap Up stacks up to a maximum of 100%.
| Notable UnboostableWeapons that have skills that cannot be boosted by any summon aura. C.A. DMG Cap Sources | ||||||||||||
|---|---|---|---|---|---|---|---|---|---|---|---|---|
| ||||||||||||
| Notable Boostable C.A. DMG Cap Sources | ||||||||||||
Boosted by Optimus aura. |
Boosted by Omega aura.
Boosted by Odious aura. | |||||||||||


Special Charge Attack DMG Cap Up
Special C.A. DMG Cap Up allows charge attacks to exceed the hard damage cap of 13.1 or 6.6 million present in most Impossible Raids. This bonus stacks up to a maximum of 30%. It is important to note that this boost to damage cap only applies if the hard cap has been reached. Therefore, to benefit from this weapon skill, the grid must have substantial C.A. DMG boosting sources.
| Notable Farmable Special C.A. DMG Cap Sources | |||||
|---|---|---|---|---|---|
| |||||
| Notable Premium Special C.A. DMG Cap Sources | |||||
|


Charge Attack Supplemental DMG
Charge Attack Supplemental (C.A. Supp.) and C.A. Supp. (Sp.) function identically, stacking independently of each other. C.A. Supp. stacks up to a maximum of 1,000,000.
| Notable Farmable C.A. Supplemental Sources | ||||||||
|---|---|---|---|---|---|---|---|---|
| ||||||||
| Notable Premium C.A. Supplemental Sources | ||||||||
|


Charge Attack Bonus DMG
Some weapon skills may grant Bonus DMG to charge attacks. This modifier adds an extra instance of damage that deals a percentage of the total charge attack damage inflicted.
| Notable Farmable C.A. Bonus DMG Sources | ||
|---|---|---|
| ||
| Notable Premium C.A. Bonus DMG Sources | ||
|


Charge Attack DMG Amplify
Charge Attack Amplify (C.A. Amp.) and C.A. Amp (Sp.) function identically, stacking independently of each other. This modifier applies a percentage increase to your final charge attack damage. This bonus is additive with any other weapons or effects that provide damage amplification such as Arcarum Summons and the Seraphic-ATK modifier found on Seraphic Weapons, Ultima Weapons and Destroyer Weapons.
| Notable Farmable C.A. Amp. Sources | ||
|---|---|---|
| Notable Farmable C.A. Amp. (Sp.) Sources | ||
| ||
| Notable Premium C.A. Amp. (Sp.) Sources | ||
|

Chain Burst DMG Cap Up
Chain Burst DMG Cap Up stacks up to a maximum of 100%.
| Notable Farmable C.B. Cap Sources | ||||||
|---|---|---|---|---|---|---|
| ||||||
| Notable Premium C.B. Cap Sources | ||||||
|


Chain Burst DMG Amplify
Charge Burst Amplify is a modifier that applies a percentage increase to your final Chain Burst damage. This bonus is additive with any other weapons or effects that provide damage amplification such as Arcarum Summons and the Seraphic-ATK modifier found on Seraphic Weapons, Ultima Weapons and Destroyer Weapons.
| Notable Farmable C.B. Amp. Sources | ||
|---|---|---|
| ||
| Notable Premium C.B. Amp. Sources | ||
|
100% Critical Hit Rate Grids
Critical damage is one way grids can increase their overall damage output. While critical hits do not raise the damage cap, they can help reach existing damage caps more consistently. Additionally, some weapon skills may only activate on critical hits.
It is important to note that critical hit rate from the grid does NOT stack additively with other sources like character skills or EMP. For example, having 80% grid crit and 20% crit from EMPs does not mean that you have 100% critical hit rate. Instead, each instance is calculated separately. See Critical Damage for further information.
All types of damage can critically hit, however critical hits can only occur against elements that are weak to your element, as well as against Null element foes.
For consistency, crit grids will often focus on reaching 100% critical rate. By default, critical hits deal 50% increased damage and this value can be increased through the Overskills system.
Crit grids can often be quite restrictive to build as they require numerous weapon slots to achieve a reliable critical hit rate.
|
Here's a tip! Players can check a grids current critical hit rate with the in-game grid skill boost info menu or by manually calculating it with numbers from the Weapon Skills page. * Note: The in-game estimated damage calculator will not apply critical hit damage unless your critical hit rate is 100%. |
Achieving 100% Crit
The typical crit calculation is as follows:
(Combined Weapon Crit Rate) x (1 + (Combined Summon Aura Boost))
Example 1:
This example uses double sided 5★ aura boost from Tiamat which allows for more grid customization but limits the summon options.
| Critical Weapons | Aura Boost | ||||||
| + |  |
× | + | = 100.7% | |||
| (10% + 10% + 6.5%) = 26.5% | 1 + (140% + 140%) = 380% | ||||||


Example 2:
This example uses a single Lvl 250 Tiamat which requires quite a few grid weapons, but frees up the main/support summon to run something with more utility.
| Critical Weapons | Aura Boost | ||||||
| + | × |  |Transcendence Lvl 5 |
+ | = 102.3% | |||
| (10% + 10% + 6.5% + 6.5%) = 33.0% | 1 + (170% + 20% + 20%) = 310% | ||||||


Critical Hit Weapons
| Notable Omega Crit Weapons | |||||||||||||||||
|---|---|---|---|---|---|---|---|---|---|---|---|---|---|---|---|---|---|
| |||||||||||||||||
| Notable Optimus Crit Weapons | |||||||||||||||||
| |||||||||||||||||
| Notable UnboostedWeapons that have crit skills that are not boosted by any summon aura. Crit Weapons | |||||||||||||||||
|


Critical Amplify Weapons
Critical Amplify is a modifier that applies a percentage increase to all types of damage when the attack is a critical hit. This bonus is additive with any other weapons or effects that provide damage amplification such as Arcarum Summons and the Seraphic-ATK modifier found on Seraphic Weapons, Ultima Weapons and Destroyer Weapons.
| Notable Crit Amplify Weapons | |||
|---|---|---|---|
|
How to Choose Your Main and Support Summon
Nearly all setups will default to bringing at least one Weapon Skill boosting summon as many weapons have skills that scale significantly with these auras. The choice of the second summon is often determined by whether the setup requires a specific Call or Aura effect from an Elemental ATK% Summon, most commonly a Providence Summon.
Aura boosting summons typically go well with:
- Weapon skills that have aura boosting thresholds such as


- Weapon skills that have low base skill numbers and prefer being boosted like Tempering and Glory.
- Grid setups that want to reach 100% critical hit rate, boosting skills like Celere and Verity.
| Weapon Skill Boosting Summons | ||||||||||||
|---|---|---|---|---|---|---|---|---|---|---|---|---|
| % boost to (elemental) weapon skills | ||||||||||||
| Elemental Summons | ||||||||||||
| % boost to all elemental ATK |


Other things to consider include summons that provide a unique utility even if their ATK boost is lower. Listed below are some examples of these cases:
| Summon | Notes |
|---|---|
 Qilin |
|
 Huanglong |
|
 Kaguya (Summon) |
|
Lucifer |
|
Transitioning to an Optimus "Primal" Grid
 |
All content in the game is clearable with Omega grids. Building Optimus is not a required step in progression. |
Why Transition to an Optimus Grid?
- You simply enjoy an element and how it plays.
- A properly built Optimus grid will outperform Omega grids.
- This can make certain content "easier" to tackle due to the higher damage output and increase in survivability.
- While Optimus grids have a higher power ceiling than Omega grids, a well built Omega grid will almost always outperform a poorly made Optimus grid. Before considering transitioning to Optimus, you should verify that you own all the necessary pieces to truly make it shine, otherwise it will just be a waste of resources.
The Cost of Transitioning
Both Omega and Optimus grids are continuously updated as the game's meta shifts and new weapons and characters are introduced. For Optimus grids, this is particularly significant as you may need multiple copies of a weapon obtainable only from the gacha. It is strongly recommended to only focus on one, maybe two, elements to make the level of investment manageable. Investing in multiple Optimus grids is uncommon among players, as it requires a combination of luck and high monetary investment.
Uncap materials are very limited and a single Optimus grid can consume the majority of an account's available 

It is recommended to have most or all of the grid pieces and summons ready before uncapping any with 
Poor Reasons to Transition to an Optimus Grid
- You want to skip farming an Omega grid.
- New content releases all of the time, and grids are constantly evolving. Building an Optimus grid is not a one-and-done task and will still require farming of some sort, whether that be due to the release of new farmable weapons or

- New content releases all of the time, and grids are constantly evolving. Building an Optimus grid is not a one-and-done task and will still require farming of some sort, whether that be due to the release of new farmable weapons or
- You already have most or all of the pieces for an Optimus grid.
- Simply having pieces for a grid does not mean you have to invest into it.
- Having Grand weapons does not necessarily mean an Optimus grid will outperform an Omega grid.
- Even if the resulting grid is technically stronger, it is important to consider whether the improvement justifies the significant investment cost for you.
Remember that these are simply guidelines meant to help you progress as efficiently as possible. Ultimately, players are free to play the game however they choose, and its important to recognize that not everyone shares the same priorities or aims for the same level of grid optimization.
Dark Opus Weapons
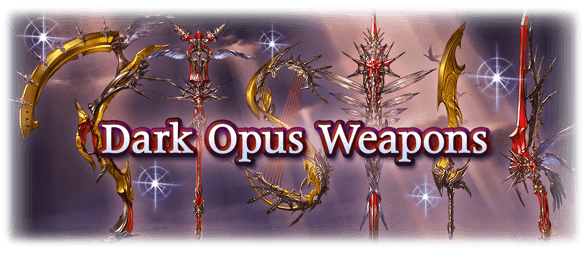


Dark Opus weapons are an integral part of all weapon grids once fully upgraded as they are incredibly efficient grid pieces while also having the flexibility to change their weapon skills to suit the content they're used in. A 5★ uncapped Dark Opus is a very substantial power increase for any grid due to the variety and strength of the pendulums and chains available.
At rank 170, players will gain access to the 


Belial drops 


Choosing Pendulums and Chains
It's important to note that Pendulums and Chains are consumable and will need to be repurchased if another weapon skill is desired.

| Weapon | Recommended Keys | ||
|---|---|---|---|
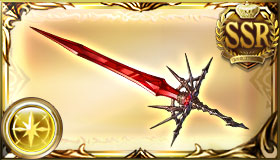 Dark Opus (Any) |
2nd Slot 50% boost to all allies' skill DMG cap β Pendulum (Lvl 120 required) |
3rd Slot Big boost to weapon element allies' ATK based on how high HP is Pendulum of Strength (Lvl 200 required) | |
The 2nd key slot gives a damage cap up weapon skill based on the key selected. Any of these options are good, just be sure to pick whichever is not already equipped on your Ultima weapon.
| Key | Cap Up | Notes |
|---|---|---|
 N.A. CapAlso called "One-Foe Attack" or "Normal Attack" |
| |
 Skill Cap |
| |
 C.A. CapCharge Attack |
| |
 C.B. CapChain Burst |
|


Below are the most commonly used 3rd skill keys. For the full list of available keys, see #Guiding Gospel.
| Key | Nickname | Notes |
|---|---|---|
| Stamina |
| |
| Echo Key |
| |
| Freyr Key |
| |
| Glory |
| |
| Majesty |
|


Dark Opus Transcendence



Uncap Upgrades and Changes
Dark Opus Transcendence upgrades one of the strongest weapons in the game even further. Each step provides a small boost to its power, mostly focusing on aura-boosted skills. Because of this, fully uncapping the opposing Opus to the type of grid you run has less priority (e.g., Optimus Fire players don't need to fully uncap 
| Star | Level | Key MaterialsImportant uncap materials that have limited availability or are difficult to obtain otherwise. | Upgrades |
|---|---|---|---|
| Lvl 210 |
| ||
| Lvl 220 |  |
| |
| Lvl 230 |  |
| |
| Lvl 240 |  |
| |
| Lvl 250 |   |
|


Zero Pendulums
| Key | Function | Effects | Notes |
|---|---|---|---|
 Pendulum of Extremity |
N.A. Amp |
|
|
 Pendulum of Sagacity |
Skill Amp |
| |
 Pendulum of Supremacy |
C.A. Amp |
|

Celestial Weapons
Celestial Weapons are an incredibly potent weapon slot due to their combination of powerful offensive and defensive modifiers. Uniquely, the weapons will provide further bonuses to characters whose weapon proficiencies match the Celestial weapon. The Celestial weapon type should be adjusted based on your party's proficiencies or for Voltage II synergy if your party's proficiencies are too spread out.
Celestial Weapons can be acquired through Unite and Fight events. All Nightmare difficulty raids have a chance to drop these weapons however, Nightmare Lvl 90 is the preferred method as you are able to stack Drop Rate Boosting effects while still being able to defeat the battle quickly.
Although the weapon dropped from the raid is random, each can be reduced for 
How to 4★ Uncap a Celestial Weapon
To 4★ uncap a Celestial Weapon, you will need 
- Recruit the respective Eternal (e.g.


- Level the Eternal to lvl 80.
- Defeat the Eternal in their Fate Episode.


5★ Uncap
Celestial Weapons can be further uncapped to 5★ using additional materials, most notably
Furthermore, the weapon can be Awakened to either Attack, Skill DMG or C.A..
Awakening gives the weapons the ability to adapt to whatever the team may need. However, extra care should be given when selecting an Awakening type as it requires
Obtain Priority
The priorities given for each weapon below primarily take into account the amount of relevant characters that match the respective weapon proficiency. Any additional factors that impact the priority will be listed.
| Celestial Weapons | |||||
|---|---|---|---|---|---|
| Weapon | |||||
| Priority | ★★★★・ High |
★・・・・ Low |
★★★★・ High |
★・・・・ Low |
★★★★★ High |
| Weapon |  Can be utilized effectively in  | ||||
|---|---|---|---|---|---|
| Priority | ★★★・・ Medium |
★★★★★ High |
★★★・・ Medium |
★★・・・ Low |
★★★・・ Medium |
Awakening Recommendations
Below are commonly used awakening types for Celestial Weapons. However, since awakening requires
| Celestial Weapons | |||||
|---|---|---|---|---|---|
| Weapon | |||||
| Awakening | - | - | |||
| Weapon | |||||
|---|---|---|---|---|---|
| Awakening |
New World Foundation Weapons

 |
 |
 |
 |
 |
 |
 |
 |
 |
 |
All New World Foundation Weapons provide an EX ATK modifier, DMG Cap in Arcarum and an additional effect unique to each weapon when equipped as a main weapon. These modifiers are enhanced when uncapped to 5★ and they also gain a general 5% DMG cap that is available outside of Arcarum. Furthermore, the main weapon restriction is lifted for the additional effect.
New World Foundation weapons are a necessary step in Uncapping an Evoker. As such, the weapon's priority is based mostly on the corresponding Evoker's priority.
World Weapons

The materials required for the World Weapons can be acquired from the The World solo fight in Replicard Sandbox or from the raid version unlocked at rank 170, The World (Raid).
While each World Weapon can be Awakened, unlike other Weapon Series, World Weapons only possess one Awakening type.
All World weapons possess a damage amplification modifier, limited to a certain damage type, and available only to characters with certain weapon proficiencies.
| Weapon | Awakening | Type of DMG Amplified | Weapon Proficiencies Affected |
|---|---|---|---|
 Worldscathing Leon |
Attack |
Normal Attack Damage |   |
 Worldstorming Aetos |
Skill DMG |
Skill Damage |   |
 Worldbreaking Tauros |
Skill DMG |
Skill Damage |   |
 Worldvexing Angelos |
Attack |
Normal Attack Damage |   |
 Worldforging Moros |
C.A. |
Charge Attack Damage |   |
Revans Weapons


At rank 200, players will gain access to Revans Raids. The Revans Weapons these raids drop can be further strengthened through the Weapon Awakening system.
It's important to note that the Weapon Awakening level will reset if switching to a different awakening type. Additional materials will be needed again if another Awakening type is desired.

Awakening Revans
The bonuses that Weapon Awakening provides for Revans Weapons are particularly significant compared to other weapon series. Many Revans weapons depend on their Awakening effects to be a competitive grid option and can feel underwhelming if used without them.
- Attack provides a Normal modifier attack boost.
- Defense can be a good source of HP and DEF for any setups that require more survivability.
- Special can provide additional forms of DMG Cap.


| Total | Might +35%Multiplier: Normal ATK +500 |
DEF +15% HP +55% |
C.A. DMG Cap +7% DMG Cap +5% HP +50 ATK +200 |
|---|
Should you Mk II Forge?

Mk II forging Revans weapons is incredibly costly and requires farming multiple different Revans raids, so players should prioritize which weapons to upgrade.
- Attack further improves the raw attack of the weapon making them extremely efficient gridpieces for raw damage.
- Defense provides a relatively minor increase in suvivability. Not fully necessary unless your team needs the extra boost.
- Special provides even more types of DMG Cap, making them an efficient gridpiece when DMG Cap is desired.
Be sure to check out each individual elemental page to see which weapons and which Awakenings are used frequently.
Stats gained with Mk II Awakening
Below is a table of each additional stat gained per awakening level after Mk II forging:
| Total | EX Might +10% Elemental ATK +15% |
Debuff Resistance +5% Healing Cap +5% Elemental Reduc. +5% |
C.A. DMG Cap +3% Skill DMG Cap +5% Normal Attack DMG Cap +4% |
|---|
Mk II Forge Cost
While Mk II awakening provides particularly potent effects, they cost a significant amount of resources to do so. Uncapping and awakening a Mk I Revans weapon will require 125 of the respective Revans material (e.g. 





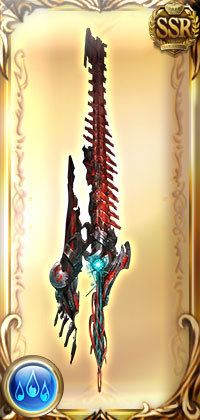


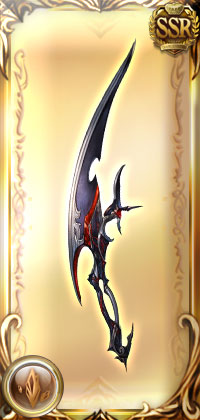


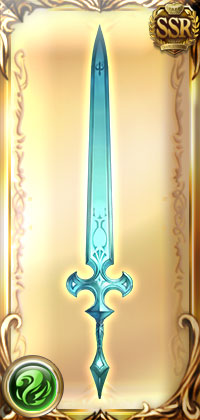


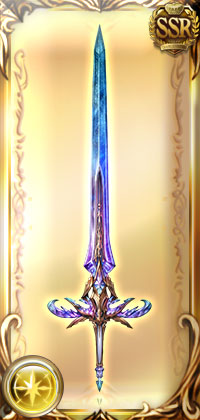


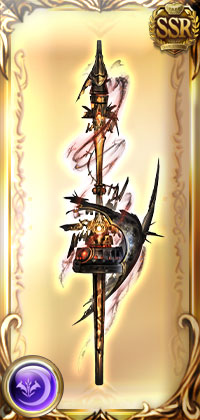
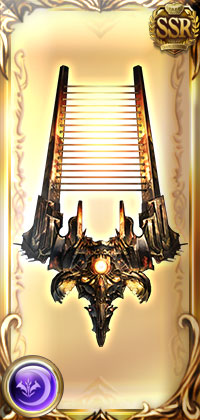


Ultima Weapons



Your First Ultima Weapon
Ultima Weapons are a unique weapon series that can equip different keys to gain different effects. From the Heart of the Sun event, players received a free 5★ uncapped Ultima weapon which is usually reserved for rank 200+ players who can clear 
Below are recommended Ultima configurations that are widely utilized:
| Recommended Weapon Type |
Recommended Element | Recommended Keys | ||
|---|---|---|---|---|
 Ultima Staff |
 |
1st Slot Big boost to allies' ATK based on how high HP is (Only affects this weapon type specialty allies. ATK boost is based on weapon skill level) Gauph Key of Strength |
2nd Slot 10% Boost to one-foe attack DMG cap Gauph Key α (N.A. Cap) |
3rd Slot Amplify all allies' superior elemental DMG by 25% Gauph Key Tria (Lvl 200 required) |
 Ultima Sword |
  | |||
The element of the Ultima Weapon only matters when it is equipped as a main weapon. The recommended elements listed above were selected due to the lack of relevant or budget farmable options for the corresponding weapon type and element.

What Weapon Type Affects
Your Ultima weapon type only affects the boost it gives on its first key slot as well as its ability to be used as a main weapon. This boost can largely be ignored in early game setups. For more advanced setups, players may craft different Ultima Weapon types to min-max their damage output for key characters.
Choosing an Ultima Weapon Type
When deciding on which Ultima Weapon type to make, it's always best to consider what would benefit the teams that you use the most. Each player has different teams and characters available to them so there is no single "correct" choice.
The element selected for the weapon is largely irrelevant as Ultima Weapons are rarely used as main weapons. If you need some general guidance, refer to the chart below.
Hover over special icons to show specific usage cases.
| Ultima Type | Commonly Used In | Recommended Element |
|---|---|---|
 Ultima Sword |
  |
|
 Ultima Dagger |
N/A | Not recommended. |
 Ultima Spear |
 |
|
 Ultima Axe |
|
 |
 Ultima Staff |
|
|
| Ultima Type | Commonly Used In | Recommended Element |
|---|---|---|
 Ultima Gun |
   |
|
 Ultima Claw |
 |
|
 Ultima Bow |
N/A | Not recommended. |
 Ultima Harp |
  |
|
 Ultima Blade |
 |
|
Choosing Gauph Keys
Leveling your Ultima Weapon to lvl 200 is very important, as it will gain access to its 3rd Gauph Key slot which is the most impactful part of this weapon. Once this key slot is unlocked, be sure to equip the 
It's important to note that Gauph Keys are consumable and will need to be repurchased if another weapon skill is desired.
  Amplify all allies' superior elemental DMG by 25% |


As mentioned previously, the 1st key slot only boosts allies that match the weapon type of the Ultima Weapon being used. While it is nice when the team's weapon proficiencies match up, it shouldn't be forced.
| Key | Nickname | Notes |
|---|---|---|
| Stamina |
Recommended!
| |
| Multiattack |
|


The 2nd key slot gives a damage cap up weapon skill based on the key selected. Any of these options are good, just be sure to pick whichever is not already equipped on your Dark Opus weapon. This weapon skill will affect all allies regardless of their weapon proficiency and the Ultima Weapon's forged element.


The 3rd key slot is the most impactful and defines what the weapon is used for. This weapon skill will affect all allies regardless of their weapon proficiency and the Ultima Weapon's forged element.
| Key | Nickname | Notes |
|---|---|---|
| Seraphic |
Recommended!
| |
| Healing |
| |
| Charge Bar Gain |
| |
| Damage Cap Up |
|


For further information on these Gauph Keys, see: Gate of Omnipotence.
Draconic Weapons Provenance

 |
 |
 |
 |
 |
 |
Upon reforging Draconic Weapons into their Provenance forms, these weapons gain a number of benefits. They can be equipped alongside Dark Opus Weapons and can also be equipped in the additional weapon slots for Party Set Extra teams. This provides additional flexibilty in weapon choices when building a grid.
Provenance Forge Cost
| Forging Draconic Provenance | ||||||
Needed Lvl: 200 Skill Lvl: 20
|
||||||
| ×1000 | ×1000 | ×15 | ||||
  | ||||||
| ×10 | ×100 | ×20 | ||||
| ×1 | × | × | ||||


Provenance Telumas
Below is a table of the available Telumas that can be additionally equipped to fully forged Draconic weapons. For more information on trading for these items, see: Draconic Weapons#Six Pillars' Judgment.
It's important to note that Telumas are consumable and will need to be repurchased if another weapon skill is desired.
| Key | Nickname | Notes |
|---|---|---|
| Amp Key |
| |
| HP Key |
|


Destroyer Weapons


 |
 |
 |
 |
 |
 |
Destroyer Weapons create the foundation for fully optimized setups due to the massive offensive and defensive potential they offer. Similar to Dark Opus Weapons, Destroyer Weapons feature a weapon skill that can be changed by equipping different Anklets depending on the team's needs.
The most unique aspect of the Destroyer Weapons is its ability to grant the team with Bonus Destruction DMG to normal and charge attacks. At 3★, this bonus is only applied to MC but from 4★ onwards, it will affect the entire team. Not only is this effect a large damage increase, but it is also relevant for V2 Raid where hit count omens are prevalent.
Anklets
At 4★, the weapon can be equipped with an Anklet, granting extremely powerful bonuses to MC. Once the weapon is uncapped to 5★, these effects are extended to the entire party. There are three types of Anklets, each focused on a different damage type. Every Anklet provides 30% reduced damage taken from the superior element, similar to the Elemental Telumas


All anklets require a total aura boost of 280% or higher to activate, making it crucial for optimized setups to meet this threshold.
| Key | Damage Type | Effects | Notes |
|---|---|---|---|
| Normal Attacks |
|
Activates only when an elemental weapon skill enhancement has a boost of 280% or above.
| |
| Skill Damage |
| ||
| Charge Attacks |
|


Can I use Destroyer Weapons at 3★ or 4★?
Equipping a 3★ Destroyer Weapons is hard to justify, as its effects are specific to MC.
At 4★, Destroyer Weapons can be an upgrade depending on which gridpiece it replaces. The teamwide Bonus Destruction DMG to normal and charge attacks can effectively function as a form of cap up. Since the Anklet only affects MC at 4★, an Ultima Weapon with
In Party Set Extra teams, Destroyer Weapons can be placed in the additional slots, which may make equipping a 4★ Destroyer Weapon an easier choice.

Weapon AX Skills
Some weapons can come with random Weapon AX Skills. They do not provide significant bonuses and are largely a min-max feature. However, there is a priority in terms of which AX skill to aim for.

Weapon AX skills
In nearly all scenarios, a max roll 

Additionally, 
Be sure to farm all 4 copies of a weapon before uncapping it, in case a copy with a better AX skill drops. Please read the full article's section on the inheritance system for information on how to transfer AX skills between copies of a weapon.
Weapon Awakening

Weapon Awakening is a unique mechanic that adds additional boosts to the weapon depending on the type of awakening. Each weapon series has a different set of stat boosts for each awakening style. For information on what exact stats each awakening gives, please see the full article. Below is a rough suggestion of which awakening to pick for each series however be sure to check out their respective elements' pages for more information on individual awakening recommendations and quantities.
It's important to note that the Weapon Awakening level will reset if switching to a different awakening type. Additional materials will be needed again if another Awakening type is desired.
| Series | Priority | Notes |
|---|---|---|
| Ennead Weapons | ★★★★・ ★★・・・ ★・・・・ |
|
| Revans Weapons | ★★★★★ ★★★★★ ★★★・・ |
|
| Class Champion Weapons | ★★★★・ ★★・・・ |
|
| Celestial Weapons | N/A N/A N/A |
|
| Exo Weapons | ★★★★★ ★・・・・ |
|
| Proven Weapons | ★★・・・ ・・・・・ ★★★★・ |
|


Other Raids and Weapons



As players progress in rank, they will unlock additional raids and weapon series. However, many of these are less commonly used compared to weapons listed above.
ATK/HP Boosting Bahamut Weapons
 |
 |
 |
 |
 |
 |
HP/Multiattack Boosting Bahamut Weapons
 |
 |
 |
 |
- Bahamut weapons provide various boosts such as ATK, HP and multiattack to allies that match the required races.
- They are a good source of Normal ATK for beginner to intermediate grids and can be an an accessible option for additional weapon slots in Party Set Extra teams.
- Bahamut weapons are seldom used in optimized grids.
 |
 |
 |
 |
 |
- Hollowsky weapons provide a conditional General DMG supplemental skill to allies with the specified weapon specialties.
- Due to its overly strict activation conditions and lower overall values, they are completely overshadowed by
or Ennead Weapons that provide General Supplement DMG.
- Hollowsky weapons are seldom used in optimized grids.
 |
 |
 |
 |
 |
 |
 |
 |
 |
 |
- Cosmos weapons boost the base ATK and HP of other weapons in the grid that share its weapon type.
- Cosmos weapons are seldom used in optimized grids.
 |
 |
 |
 |
 |
 |
- Draconic Weapons are a strong defensive weapon, but their biggest tradeoff is that they cannot be equipped alongside Dark Opus Weapons. Therefore they can be a consideration if more defense is desired over offense
- They should ONLY be used at 5★ with the 3rd skill unlocked using Telumas.
- Draconic weapons can be futher enhanced through Draconic Weapons Provenance, allowing the weapons to be equipped alongside Dark Opus weapons.
- See #Draconic_Weapons_Provenance for further information.
 |
 |
 |
 |
 |
 |
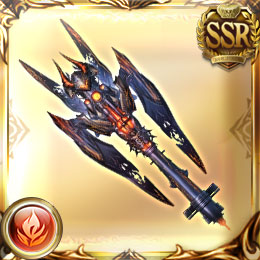
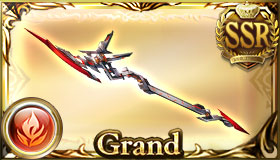
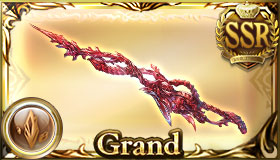
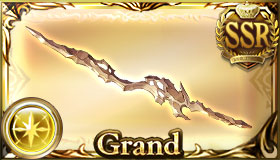
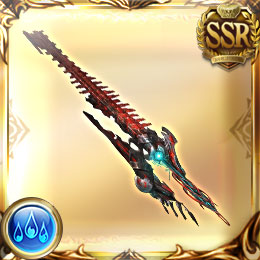
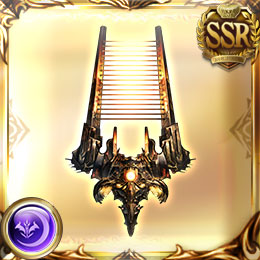
- 5★ Astral Weapons provide a strong EX ATK modifier and a specific damage cap skill, which can be useful for intermediate grids.
- However, since Astral weapons require materials that are used to recruit an Evoker, they are generally not worth crafting, as all except















































































































































































































































 |
 |
 |
 |
 |
 |
 |
 |
 |
 |




- All Sephira weapons provide an Omega attack modifier alongside an additional weapon skill that only takes effect in Arcarum: The World Beyond and Replicard Sandbox.
- These weapons can be considered filler pieces for the additional weapon slots in Party Set Extra teams until you acquire better grid options.
- Sephira weapons are seldom used in optimized grids.
 |
 |
 |
 |
 |
 |
 |
 |
 |
 |
 |
 |





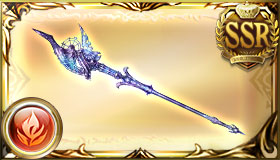



- All Militis weapons provide a Voltage II modifier that matches the weapon itself.
- The second weapon skill varies per weapon and is often the determining factor in whether the weapon is utilized in optimised setups.
- Check the respective Advanced Grids element page for further details.
Xeno Militis Weapons
 |
 |
 |
 |
 |
 |

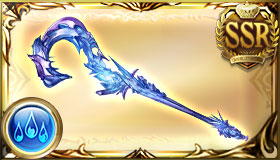



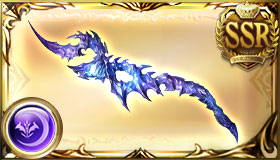
- Tetra ElementFire, Water, Earth and Wind Xeno Militis weapons provide a Majesty modifier and a scaling DEF boost. They are sometimes chosen as a defensive option for the additional weapon slots in Party Set Extra teams.
- Light and Dark Xeno Militis are not utilized frequently due to their more restrictive requirements.
- Check the respective Advanced Grids element page for further details.
Additional Resources
Other Grid Resources
- granblue.team (English, Open-Community Uploaded)
- GameWith Grids - 武器編成の強化手順|初心者向けに徹底解説! (Japanese)
- Kamigame Grids - 武器編成を強化する方法と編成例一覧 (Japanese)